How to Create an App with AngularJS
As the world becomes more and more digital, there is no better time to learn coding. However, many would argue that is far easier said than done. Many folks have a fleeting interest in coding, but the passion quickly fizzles out when rubber meets the road. That is, they have no idea where to start and more importantly, have no idea where they are heading. That is why it is best to begin a life-long journey of coding pragmatically — specifically with a goal in mind.
Think of those who wish to learn carpentry. Every successful carpenter wants to learn how to build a chair, a cabinet, or even a house. They don't just fiddle with 2x4s and buzz saws with no end goal in mind. However, this is exactly what folks tend to do with computer programming. They want to learn coding, so they write a couple "hello world" programs in Java, learn to parse a few strings in Python, and then quit. They fail to see the applicability of their tinkering. There was no goal in mind, so the ambition dwindled. But that is where the AngularJS framework comes in.
This post will discuss the prerequisites required to create your very own AngularJS app. Additionally, we'll discuss running your new site on a local server and serving up static content. The goal in mind is that you will have all the basic code required to create a website. Let's dig in!
AngularJS: Coding Made Easier
AngularJS is a TypeScript-based framework developed by Google specifically for the development of web and mobile applications. TypeScript is the programming language used to develop AngularJS web applications. But what exactly is a framework?
Framework in this case simply means a standard method of communicating between different pieces of a web application. AngularJS regularizes the way in which the web page communicates with the business logic of the application. It also standardizes the way the business logic communicates with the database, user view, and so on. The key take away is AngularJS is not a programming language in and of itself. It is simply a structure like the frames on a house and TypeScript is everything to fill in that framework: the nails, the stucco, the cement, etc.
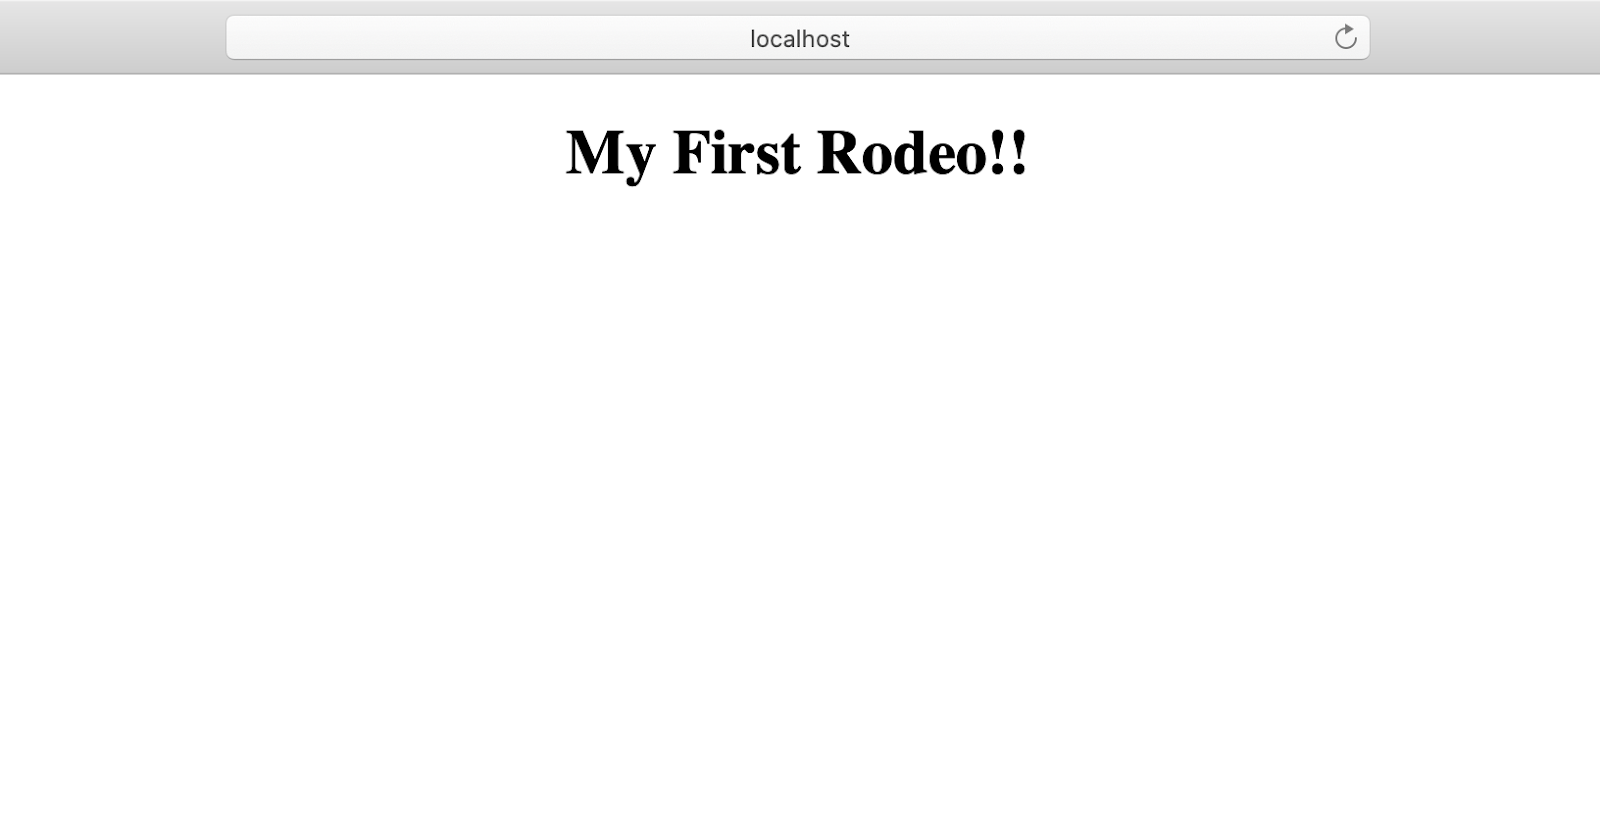
With all this context in mind, let's start building out that app. First things first, and that is downloading Node — the engine in which an AngularJS application runs. By the end of this brief tutorial, you should have a screen that looks like this:
Download NPM
NPM, or Node Packet Manager, is a way of organizing, downloading, and managing dependencies for your AngularJS application. It can be thought of as the engine of your application. Without it, we aren't going anywhere.
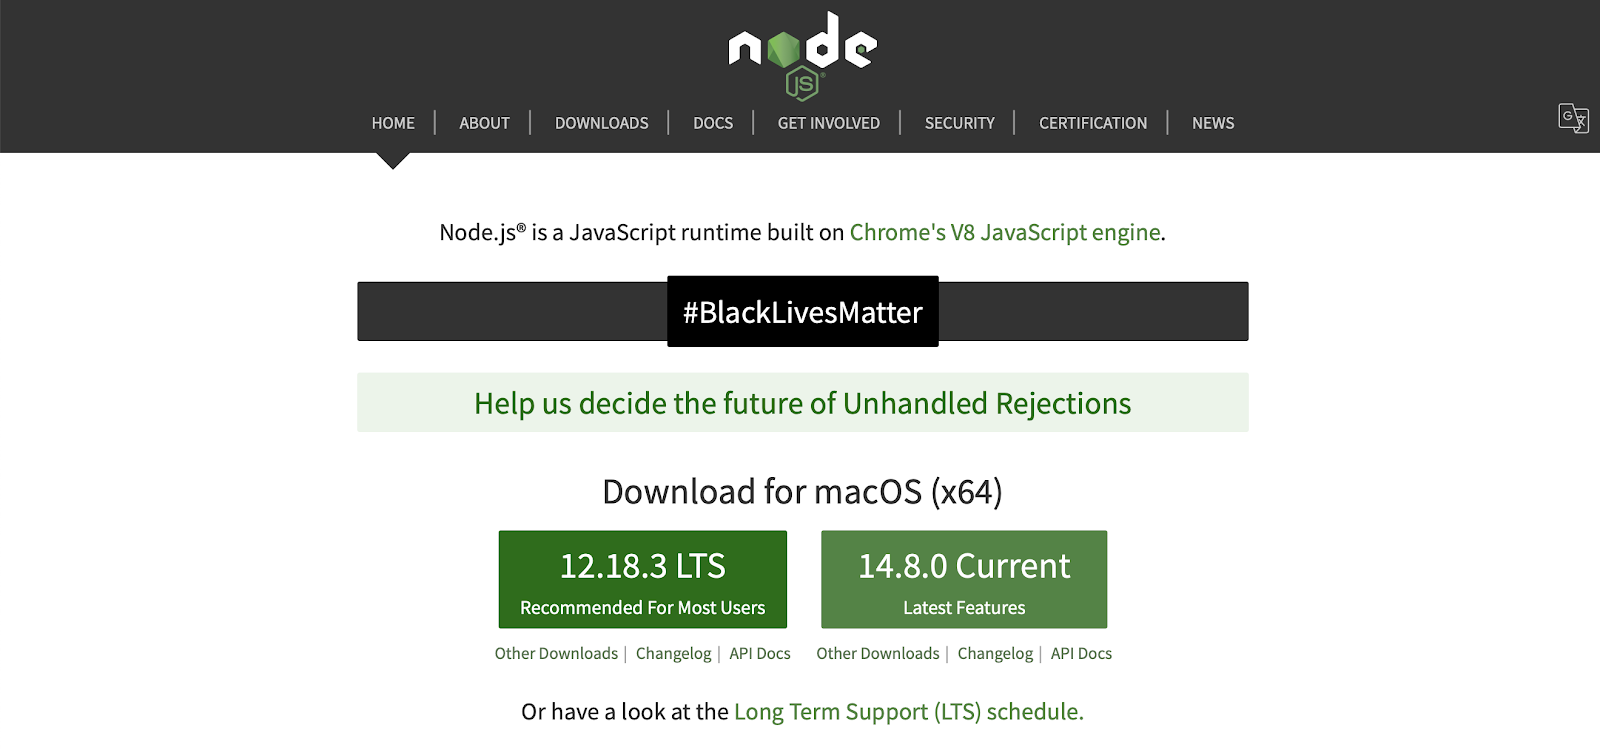
So, the first thing we will do is go to their website and download it. Please download whichever version that says it is the LTS. (At the time of this writing, that is version12.18.3.) At this point, you should be at a screen that looks like this:
Once that download is complete, go to the terminal on your Mac (or the cmd on your PC) and type node -v and hit enter. Then type npm -v and hit enter. If your screen looks something like this, you are on the right track:

For those on a Windows PC
If you are on a windows machine, there is a good chance that node will not work unless it is added to the class path. So if you try to run the above commands and it says, "no such application exists" or something to that effect, then it is not part of your class path. Let's fix that.
First, go to the nodejs download location. This will be at C:\Program Files\Nodejs. Then perform the following steps:
Go to the Windows icon on the bottom left and search "Environment Variables"
Click "Edit system environment variables"
Click "Environment Variables".
In the "System Variables" box, search for Path and edit it to include C:\Program Files\nodejs. Separate it from any other path using a ; (semicolon).
Restart your machine, then retry the command in CMD.
Now that NPM is good to go and installed, let's proceed to the next step—downloading our IDE.
Get an IDE
The next thing that you will need is an IDE. An IDE, short for integrated development environment, is software that allows a developer to code effectively and efficiently. The best one on the market is WebStorm. While it is free for only 30 days, that will be more than enough time to complete what we are about to do. Alternatively you can download Visual Studio Code for free, however, this tutorial will be done using WebStorm.
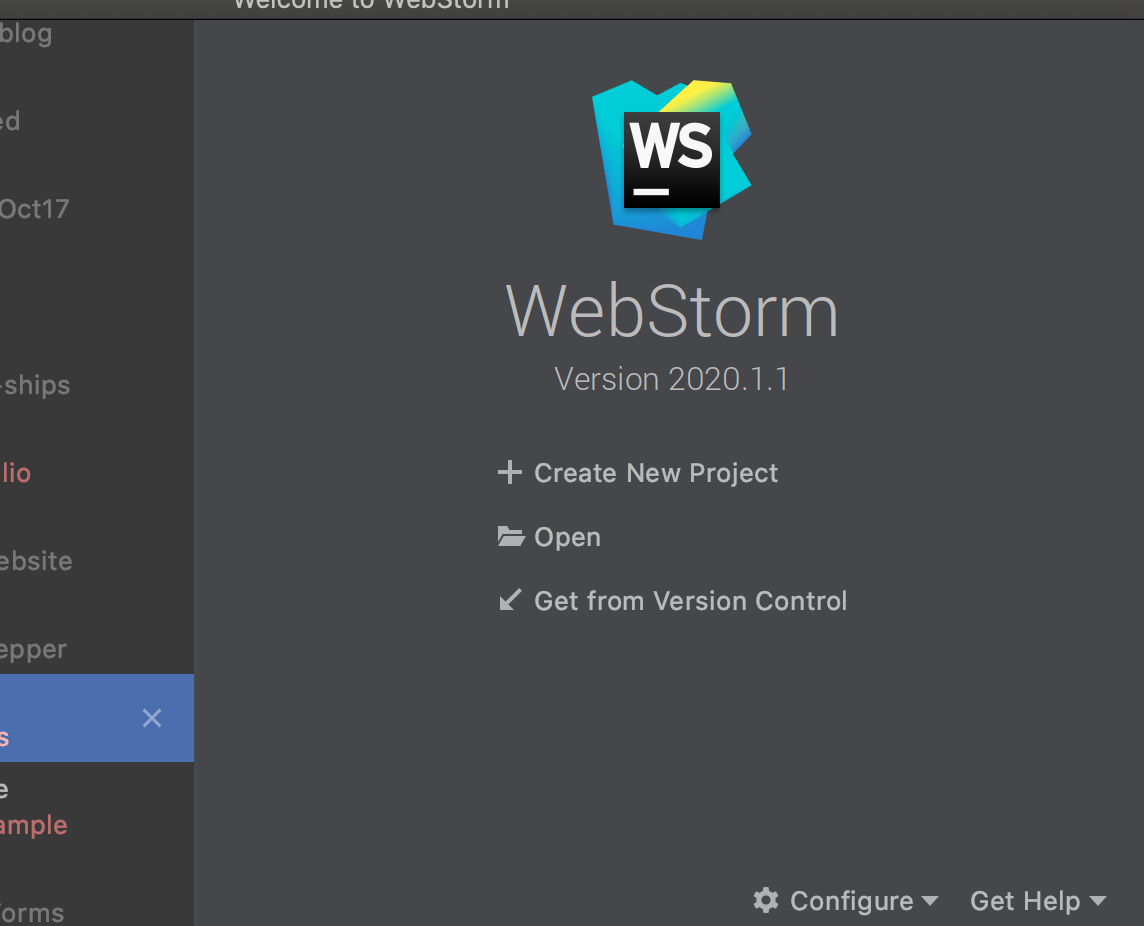
After clicking the link above, please download WebStorm. It is a pretty big piece of software so it may take awhile. Once it is complete, it should open up a screen asking to start up a new project. It will look something like this:
Click "Create new project." At this point, a host of different frameworks should appear on the left side of the screen. Click on the one that says AngularJS CLI. For the project name, call it my-first-rodeo.
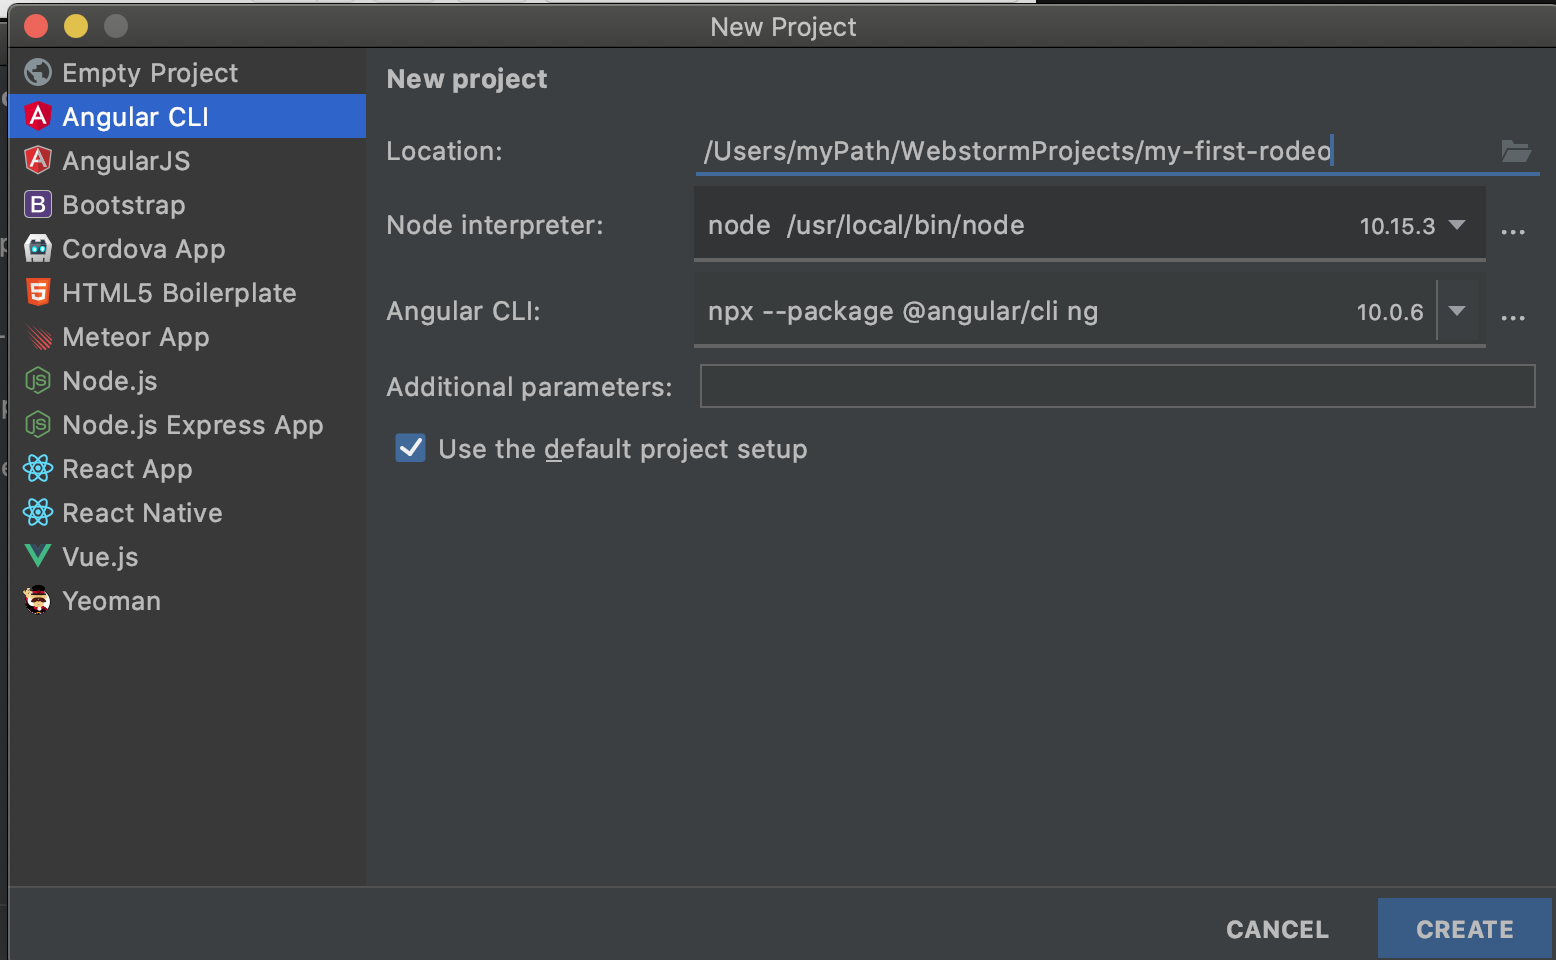
Once that is done, click Create. Once that is clicked, now WebStorm will automatically create the boilerplate code required for an AngularJS application. This is called "the scaffolding." Also, you'll observe a LOT of activity in the terminal of your IDE. The terminal is the bottom pane of the screen. This is where any directory navigation or dependency downloading will occur.
Next, take a look at the folder structure. This is the pane on the left. It will look just like this:
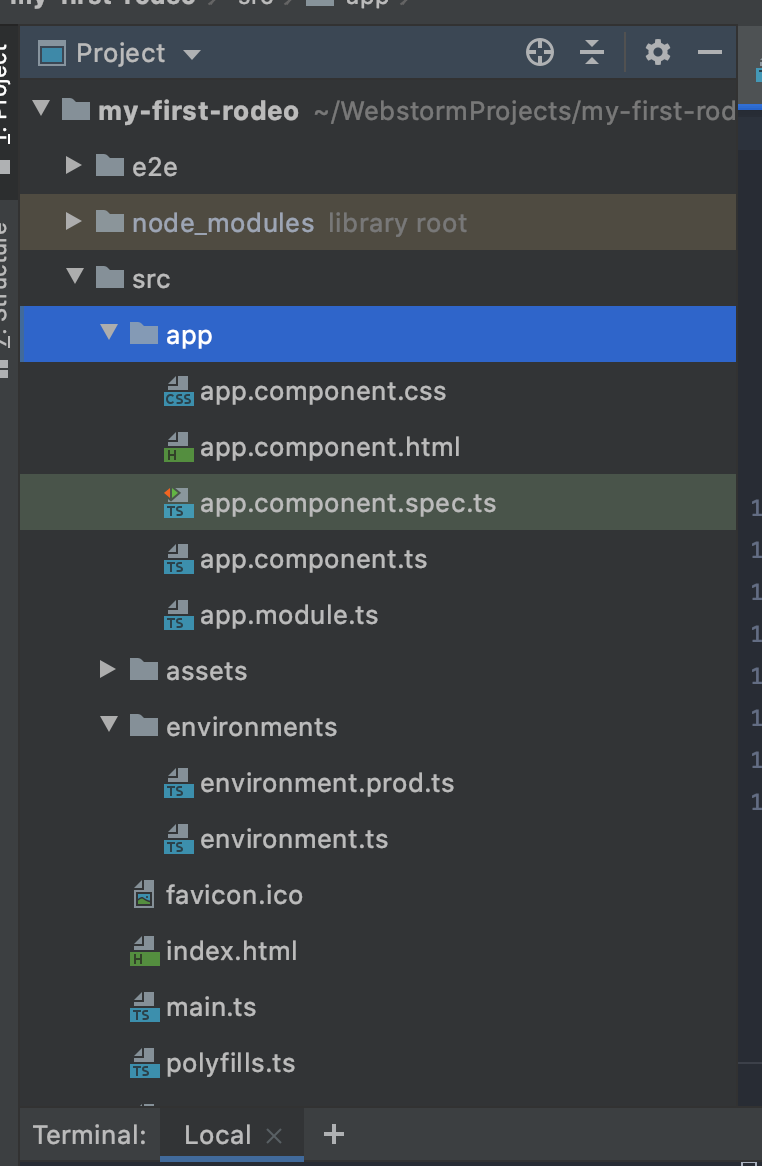
Notice all of the different folders that were created. This is all of the scaffolding required to create an AngularJS application. The directory labeled my-first-rodeo/src/app is where the majority of the code will be written for any given web app. But for now, let's just get this thing running!
Running Your AngularJS App
So we've downloaded NPM, downloaded an IDE, and created an AngularJS project. Now it is time to see it in action. To do so, we will use the handy dandy AngularJS CLI. The AngularJS CLI is a command line tool used to interact with AngularJS applications. It has several wonderful features, but for the purpose of this article we will focus on two in particular, starting with ng serve.
Ng Serve is a command line tool that allows a developer to run his or her code locally. So go ahead and type ng serve into the terminal and hit enter. If successful, it should show a screen that looks a little like this:

Now that your local server is up and running, open a browser and go to http://localhost:4200. We have officially launched our first AngularJS App! Go ahead and marvel at its pre-generated beauty. If your machine is running AngularJS 10, it should look something like this:
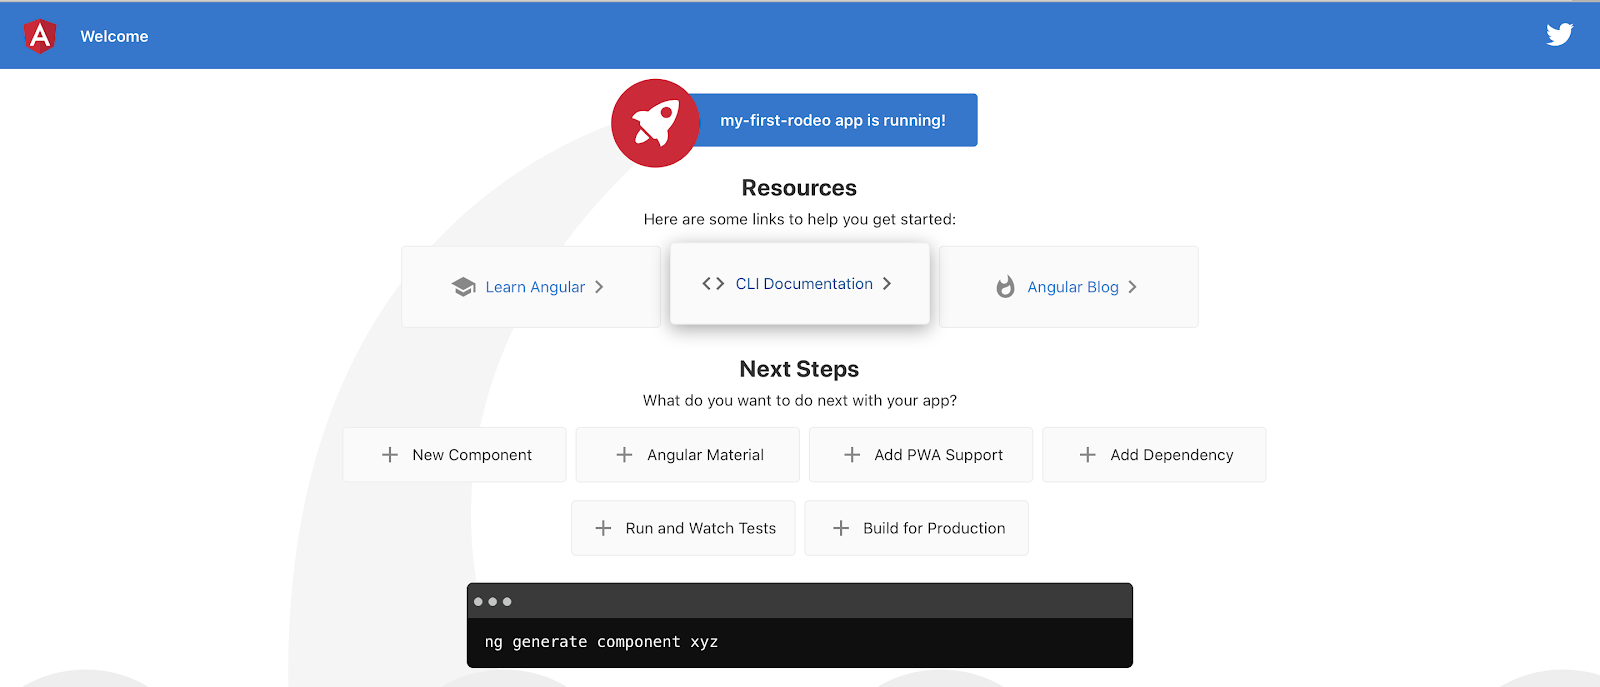
This is all well and good, but we haven't even written any code. Let's customize it by creating our own component. To create our own component however, the AngularJS CLI will have to come back into play. This time, by using ng generate.
Generating Our Own Component
Go into the WebStorm terminal—which is the bottom pane—and type ng generate c my-first-component. If done correctly, it should look like this:
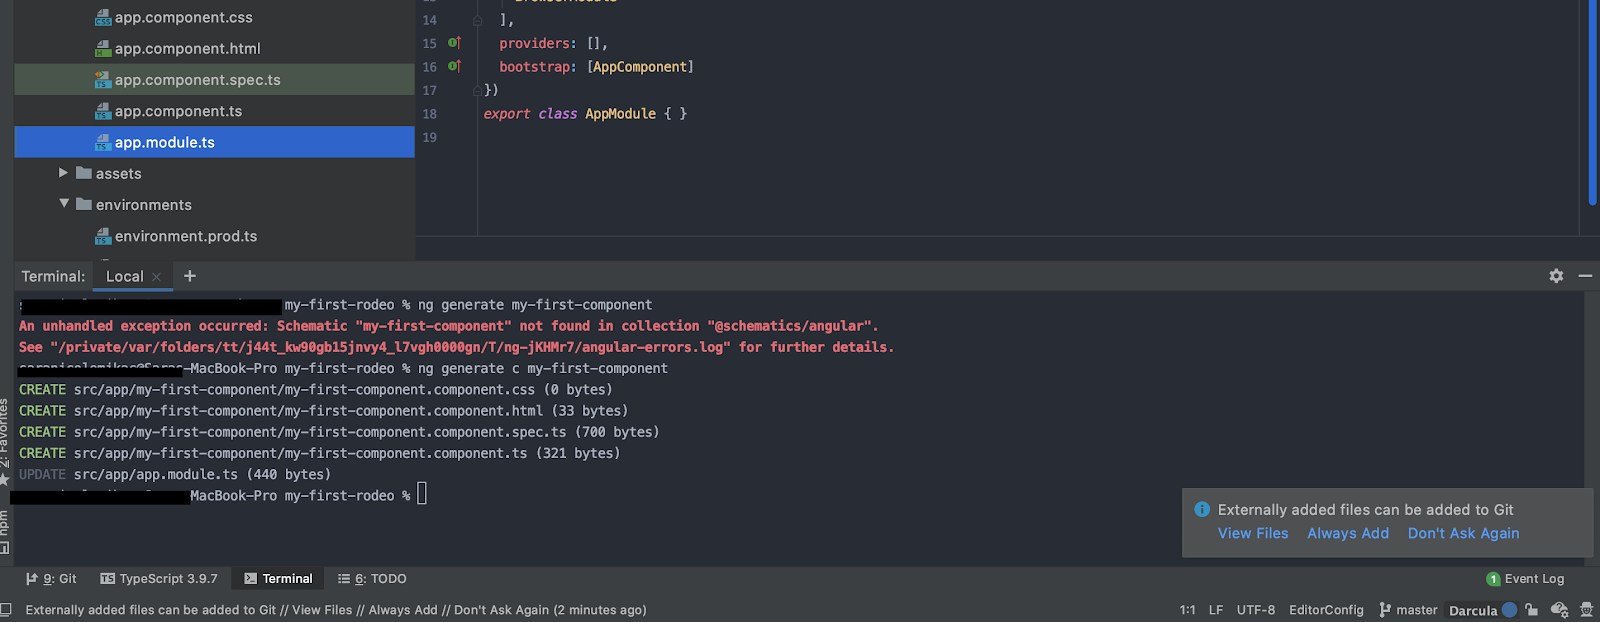
Ng generate is a great way of creating AngularJS components. AngularJS components must be created and declared in a fairly systematic way. Unfortunately this will often lead to user error if a developer attempts to create the file structure manually. Ng generate removes that risk by automatically generating all of it for you. It creates the TypeScript component, a CSS file, a spec file and lastly an HTML file.
Recall that an AngularJS component is made up of an HTML file, and a TypeScript component file with which it communicates. So, let's modify the newly generated HTML file and put it on our web page.
First, go to my-first-component.component.html and replace the text with <h1 style="text-align: center">My First Rodeo!!</h1>
Next, go into the app.component.html and delete everything. Replace it with <app-my-first-component></app-my-first-component>
These lines of code tell AngularJS to look inside that component, and display the HTML embedded inside of it. So in this case, it will show the HTML template associated with the my-first-component component.
Reload the application, and it will now look like this:

So you may be wondering how AngularJS knew to look there. In other words, how did it connect that HTML tag we inserted into app.component.html with the HTML file in my-first-component?
It knew because when the ng generate was performed, the MyFirstComponent was placed inside the app.module.ts file. This is the file that AngularJS scans to figure out which components were declared within the scope of the particular project.
Wrapping Up
Phew! That covered a lot of ground. We downloaded AngularJS prerequisites, started the server using ng serve, generated a component using ng generate, and even wrote some code. AngularJS is a powerful framework that integrates many tools such as IDE's and AngularJS CLI to facilitate automation. It also has a robust and complex design to allow a developer to code whatever they (or the product owner) desires.
It is indeed very impressive that so much boilerplate code is generated without the need of actually typing it all out. I hope you enjoyed creating your first AngularJS app, and you are now well on your way to designing a wonderful AngularJS website!
delivered to your inbox.
By submitting this form you agree to receive marketing emails from CBT Nuggets and that you have read, understood and are able to consent to our privacy policy.