TUTORIAL
How to Enable Secure Boot in Windows
by Marryam Mubariz
Wondering how to securely boot Windows and enhance your PC's safety? In this article, we'll explain how to turn on Secure Boot for your Windows PC.
We'll also explain what it is, why it's good for your computer, and show you how to set it up - no tech genius required. Let's make your Windows boot-up safer.
Project Overview
SKILL LEVEL: Entry-Level
TIME TO COMPLETE: 15-30 Minutes
ESTIMATED COST: N/A
YIELD: Enable Secure Boot in Windows
Wondering how to securely boot Windows and enhance your PC's safety? In this article, we'll explain how to turn on Secure Boot for your Windows PC. Don't worry—it's not as scary as it sounds.
We'll also explain what it is, why it's good for your computer, and show you how to set it up - no tech genius required. Let's make your Windows boot-up safer.
What You'll Need: Resources/Tools
A Windows PC (Windows 8 or later)
Administrator access to your computer
Your computer's manual or model number
Before you Begin
In this guide, we'll walk you through enabling Secure Boot on your Windows PC. Designed for everyday computer users, this tutorial will take about 15-30 minutes to complete. You'll also learn what Secure Boot is, why it's important, and how to turn it on step-by-step.
By the end, you'll have improved your PC's security, making it more resistant to certain types of malware and unauthorized operating systems. This process doesn't require any additional software or costs—just your Windows PC and a bit of patience. Before we get started, take these steps:
Backup any important files. We're not expecting any hiccups, but it's always better to be safe than sorry.
Make sure your PC is plugged in or has plenty of battery life. We don't want it shutting down mid-process.
Close all your open programs. We'll be restarting your computer a few times.
Take your time and read each step carefully. It's okay to double-check or look it up if something doesn't make sense.
What is Secure Boot?
Secure Boot is a safety feature created by PC manufacturers. It makes sure your computer only starts up using software trusted by the maker. This feature works with newer Windows versions and many Linux systems.
When you turn on your PC, Secure Boot checks if the startup software is genuine. If everything checks out, your computer starts up as usual.
Why Should You Use Secure Boot?
Secure Boot helps protect your computer from harmful software that might try to take control when your system starts up. It's an extra layer of defense against attacks that your antivirus might miss. While it's not necessary, it's a good idea to use Secure Boot for better security.
How to Enable Secure Boot in Windows
Here's how you can turn on Secure Boot, step by step. Let's start by checking if your PC already has Secure Boot turned on. It's easy, just follow these steps:
Step 1: Check Your Current Status
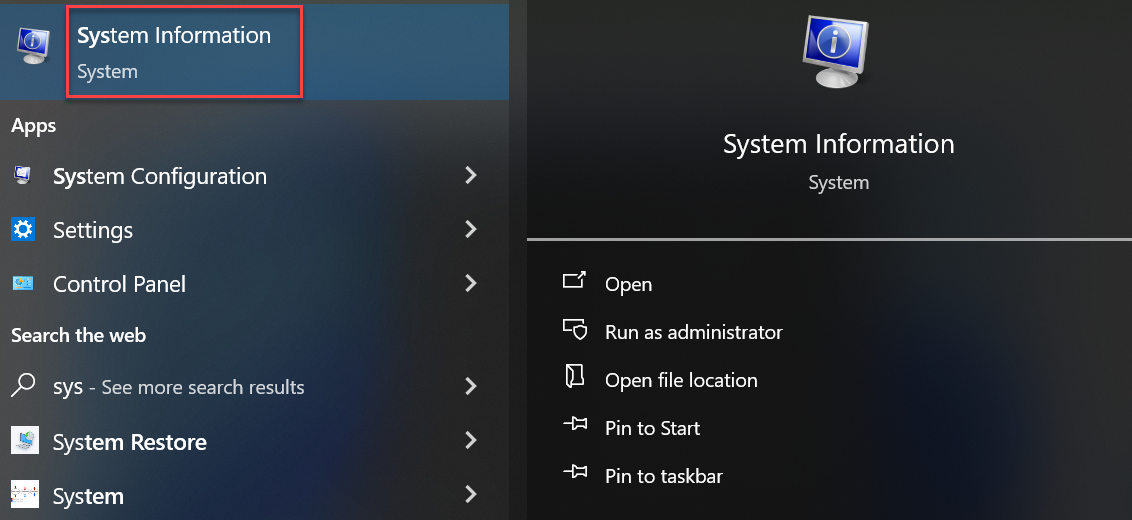
First, let's see if Secure Boot is already on. Go to the bottom of your screen and tap on search. Type in "system information" and open it.
Scroll down the page until you spot "Secure Boot State." This will tell you if it's currently on or off. If it says "Off," we'll need to turn it on.
Step 2: Open Settings
So, let's enable this. First, we need to open up our settings. You can go to the bottom, tap on search, and type in "settings," or just tap on the Windows start button and then tap on "Settings." You can also search for it at the top.
Step 3: Access Advanced Startup
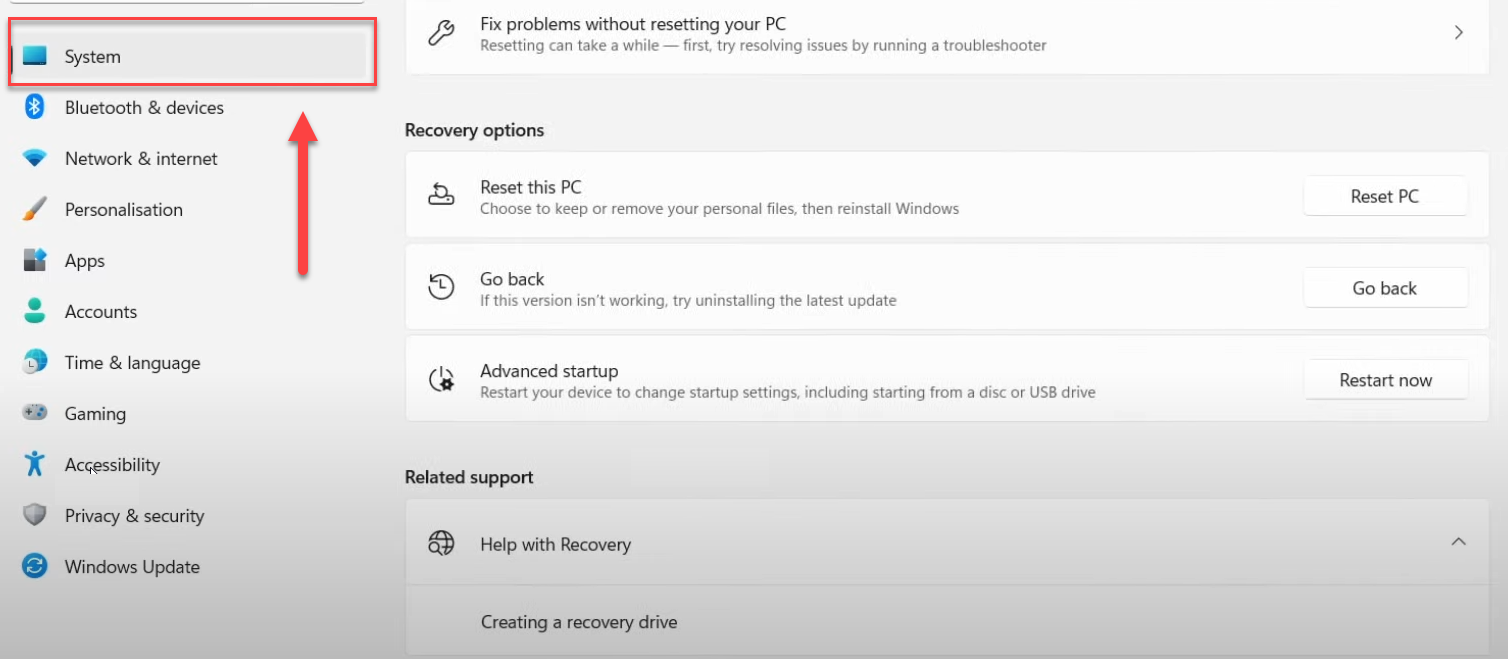
Access Advanced Startup Once in settings, look to the left side and find "Windows Update." Click on it, then tap on "Advanced options."
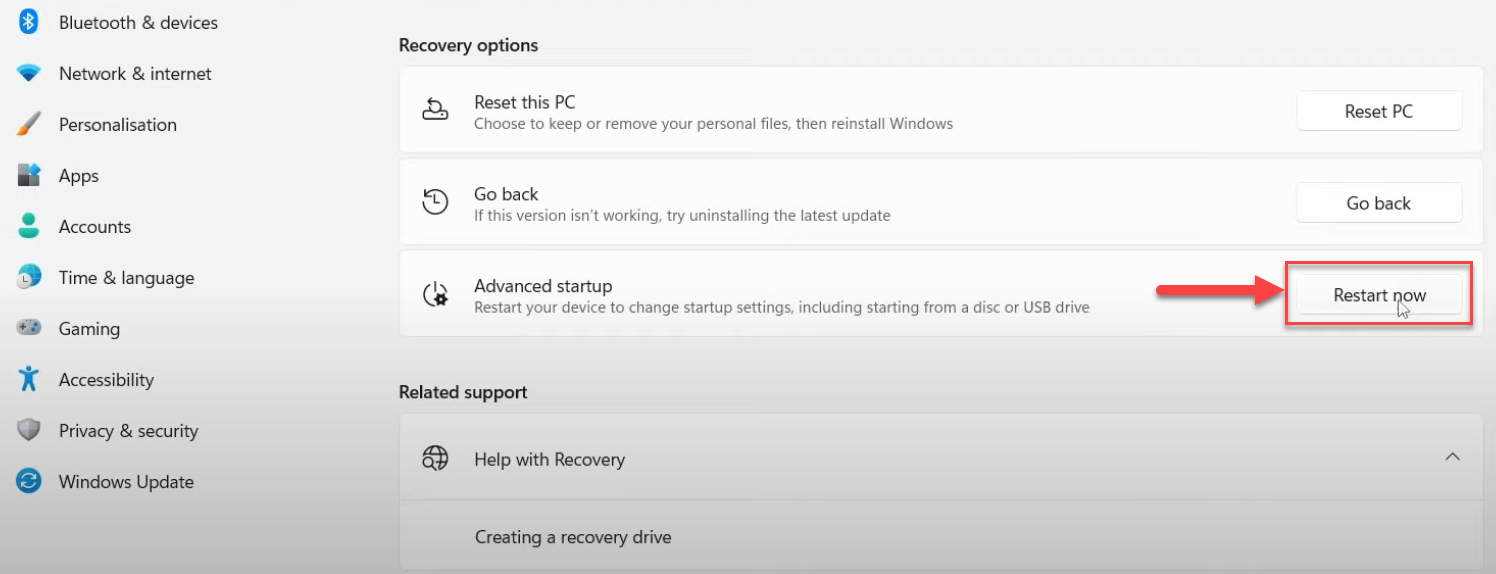
Scroll down until you see "Recovery," and under that, click on "Restart now" in the "Advanced startup" section.
Step 4: Enter UEFI Settings
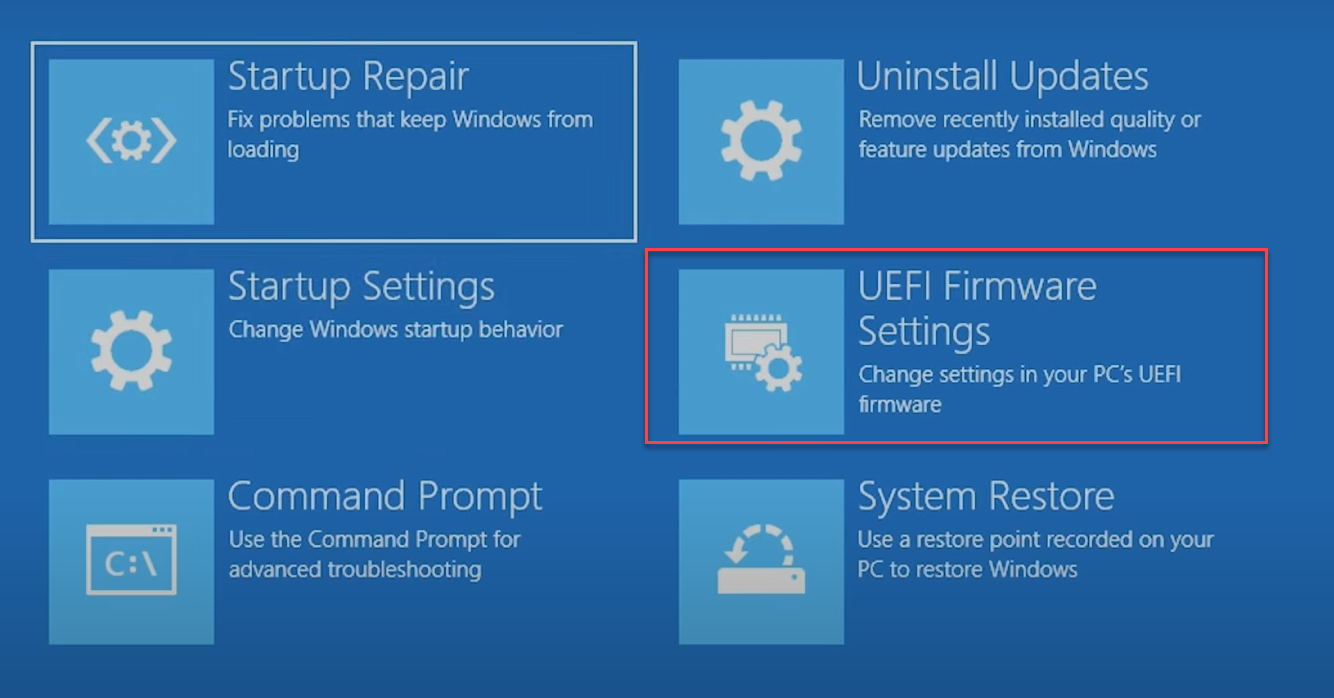
After your computer restarts, you'll see a page that says, "Choose an option." You need to tap on "Troubleshoot," then tap on "Advanced options," and then select "UEFI Firmware Settings." This will take you to your BIOS (Basic Input/Output System). Tap on it, and then restart your computer once again.
Step 5: Navigate BIOS/UEFI Menu
If you've changed your Windows in any way, you might have trouble getting into recovery mode. Don't worry, though. When you see your motherboard's logo appear, try pressing the Delete or F2 key instead.
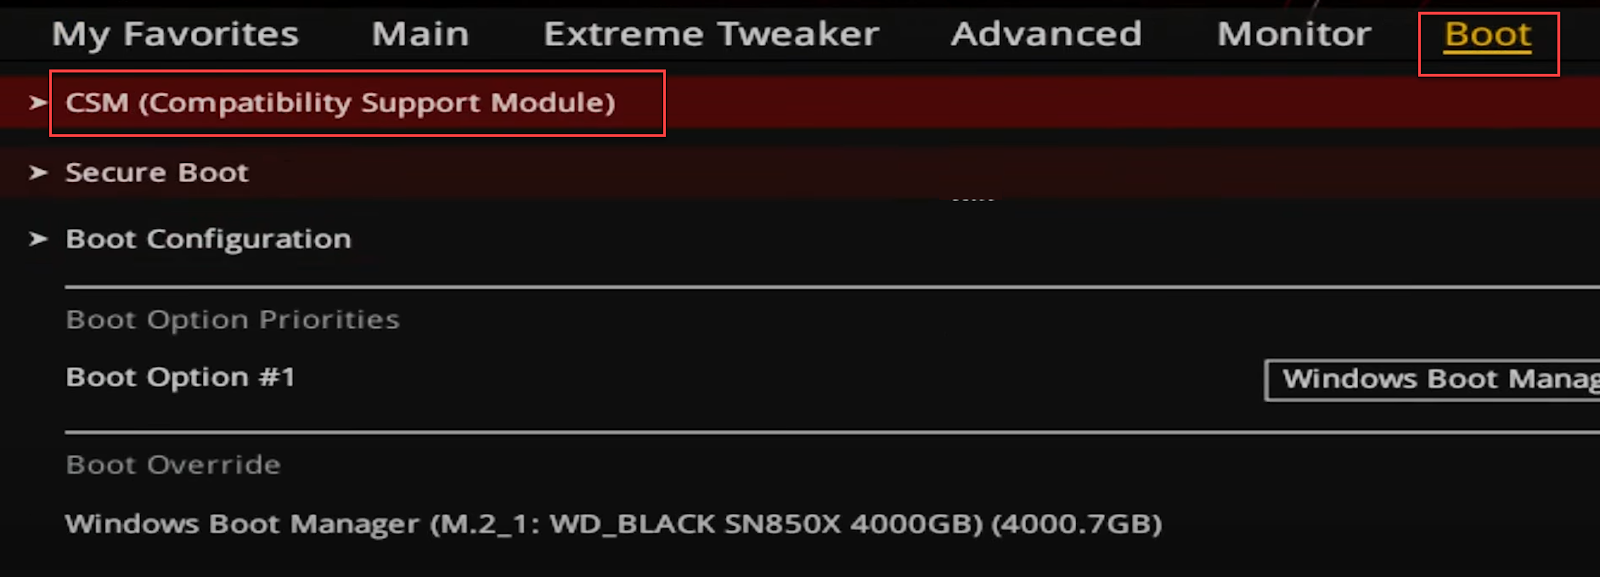
We're using an ASUS BIOS as an example here, specifically for newer Intel processors. If you see an "Easy Mode" screen, press F7 to switch to "Advanced Mode".
Next, we must ensure that the CSM (Compatibility Support Module) is turned off. Go to the Boot tab and find CSM. Set "Launch CSM" to Disabled. This puts the BIOS in UEFI mode.
Be careful, though—changing CSM might prevent Windows from starting up if it is currently enabled. If you change this setting, you might need to back up your files and reinstall Windows.
Step 6: Enable Secure Boot
Now, let's check Secure Boot. Go back to the main menu and find the Secure Boot option. Make sure "OS type" is set to "Windows UEFI mode." The "Secure Boot mode" should be "Standard." This ensures that the default Secure Boot keys are being used.
If you have an older Intel system, you might not see all these options. In that case, go to "Key Management" and choose "Install Default Secure Boot Keys." The BIOS will ask if you're sure—select Yes.
When you're done, press F10 to save your changes and exit. Your computer will restart with Secure Boot enabled.
Step 7: Verify Secure Boot is On
After Windows starts again, check the system information and look for the "Secure Boot State." You should see that it's now on, indicating we have successfully enabled Secure Boot.
If you plan to install a new operating system, enable Secure Boot before you start the installation. Don't worry if you run into any trouble.
You can always look up specific instructions for your computer model online. Different brands might have slightly different steps, but this guide should work for most Windows computers.
Conclusion
We've covered how to enable Secure Boot on Windows 11. This safety feature ensures your PC only starts with trusted software, adding an extra layer of protection against harmful programs.
We went through the steps of checking your current Secure Boot status, accessing UEFI settings through the advanced startup options, navigating the BIOS to find and enable Secure Boot, and finally verifying that it's turned on.
The exact steps may vary depending on your computer model, but this guide should work for most Windows PCs. If you're planning to install a new operating system, make sure to enable Secure Boot first.
To learn more about Windows systems, check out our Windows Server Hybrid Administrator Associate Certification Training. For more IT tutorials, visit our main tutorials page.
