TUTORIAL
How to Create Your First NestJS Project
Project Overview
EXPERIENCE LEVEL: Entry-level
TIME TO COMPLETE: 30 mins - 2 hrs
ESTIMATED COST: N/A
YIELD: Create your first nestJS project
Ready to create your first NestJS project? This tutorial will guide you through the process step-by-step, from setting up your development environment to running your very own NestJS server.
We'll start by exploring a basic NestJS project setup and then using the Nest CLI to generate a new project. Don't worry if you're new to this; we'll explain each step along the way.
By the end, you'll have a simple working NestJS application that responds with "Hello World." This NestJS project example will serve as a foundation, giving you a solid starting point for further learning and development with NestJS.
How to Create Your First NestJS Project [VIDEO]
In this video, CBT Nuggets trainer Shaun Wassell guides you through the step-by-step process of creating your first NestJS project, providing a clear and concise overview of the entire procedure.
What is NestJS?
NestJS backend framework that empowers developers to create robust, scalable server-side applications using TypeScript and Node.js. It uses TypeScript and borrows concepts from Angular, making it familiar to front-end developers.
NestJS offers a modular structure, built-in dependency injection, and easy integration with various libraries. It's designed to create efficient, scalable, and maintainable backend applications easily.
How to Create Your First NestJS Project
Let's kick things off with NestJS! But before we dive in, there's something important you should know. NestJS does things a bit differently compared to other back-end libraries like Express or Happy.js.
When you're starting a new NestJS project, you're not going to start from scratch. Instead, you'll use a "boilerplate generator" to set up your project. Now, don't let that fancy term scare you off - it's actually a pretty cool tool that's going to make your life a whole lot easier.
What is a Boilerplate Generator?
Well, it's like having a helpful robot assistant who sets up all the basic structures and files you need for your project. Instead of manually creating each file and folder, this generator does the heavy lifting for you. It's like moving into a new house that's already furnished—you just need to add your personal touch.
In the NestJS world, this boilerplate generator is called the Nest CLI (Command Line Interface). It's a powerful tool that helps you create and manage new projects.
This approach is quite different from Express, which typically starts by creating an empty folder, installing the Express package, and writing your code from scratch.
With NestJS, you'll generate a project and then work with code that's been automatically created for you. It might seem a bit strange at first, but trust me, it's going to save you a ton of time and headaches down the road.
Ready to meet this magical boilerplate generator? Let's move on to installing the Nest CLI tool into our computer and creating our first NestJS project. Buckle up because things are about to get exciting!
Step 1: Install Node.js and NPM
First, ensure your computer has fairly up-to-date versions of Node and NPM (Node Package Manager) installed.
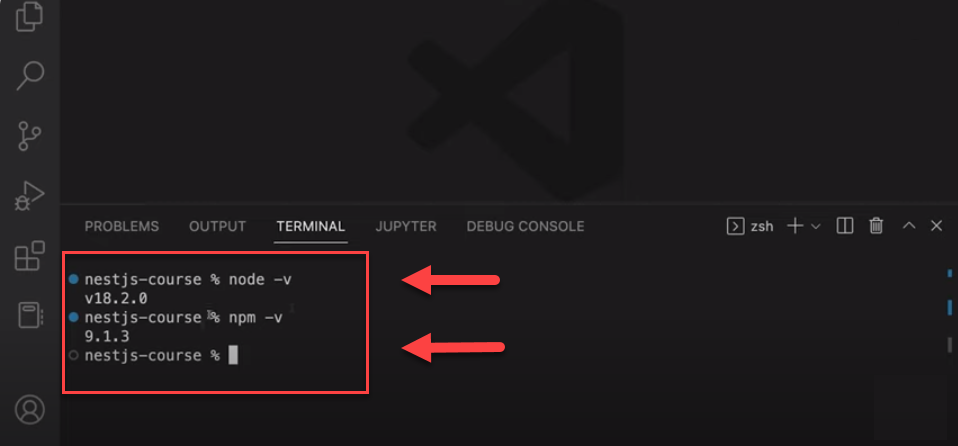
You can check those by running the commands node-v, which will show you your current Node.js version, and npm-v, which will show you your current version of NPM.
To check if you have them installed, open up your terminal and type:
If you see version numbers pop up, you're good to go! If not, head over to the official Node.js website and download the latest version. It'll come bundled with NPM, so you'll kill two birds with one stone.
Currently, I am using Node.js version 18.2.0 and npm version 9.1.3 for my development environment.
You don't need to match my exact versions, but having a relatively recent version of Node.js is crucial. Using something as outdated as Node 7, for instance, could cause issues with the commands we'll be exploring.
Step 2: Install Nest CLI
Now that we have Node.js and NPM, let's install the Nest CLI. This nifty tool will help us generate and manage our NestJS projects.
We do that by running the command “npm install -g @nestjs/cli.” To install the Nest CLI, type the following in your terminal:
npm install -g @nestjs/cliThis command will install the Nest CLI tools locally on our computer so that we can run them in our terminal regardless of the folder we're in.
Pretty cool, right?
Step 3: Generate a New Project
The next step is to generate a project using the command-line tools we just installed. Currently, I'm working in a folder called "nestjs-course." We'll create our new project inside this folder.
You can create your own folder anywhere you like in Documents, Reports, or whatever suits you best. The location isn't critical, so choose what works for you.
To create our first NestJS project, we'll use the command “nest new my-first-project.”
nest new my-first-projectThis will generate a new project named "my-first-project" and prompt us to choose a package manager. I'll select “NPM,” but feel free to use “Yarn” if you prefer.
Step 4: Explore the Project Structure
Once the CLI finishes, you'll have a shiny new NestJS project ready to go.
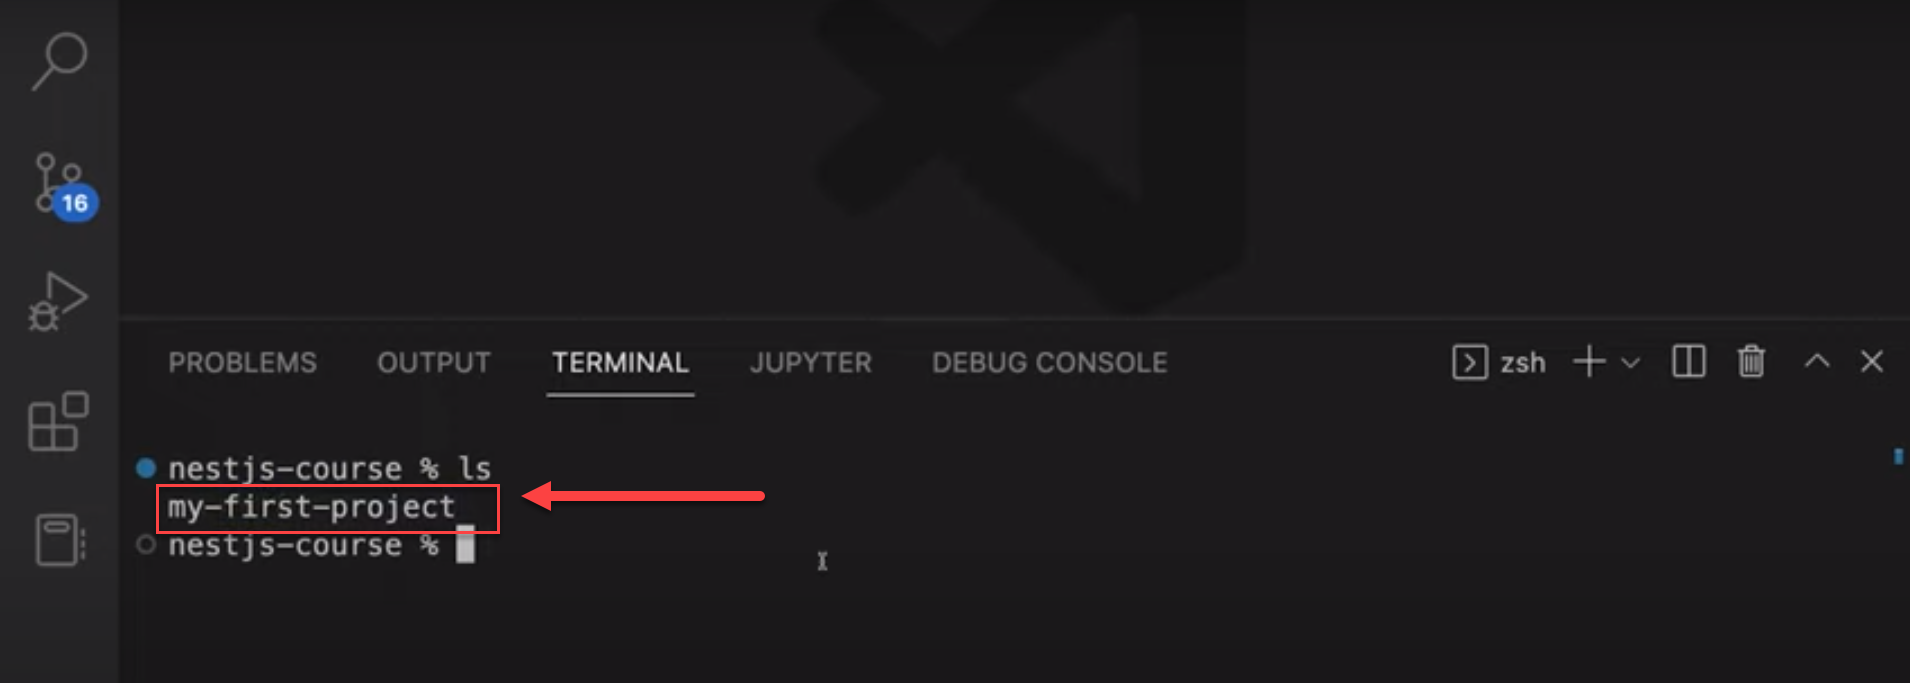
Let's open the newly created folder. If you list the contents of your current directory, you'll see a new folder named "my-first-project". This is where our NestJS project files are located.
When you open the "my-first-project" folder, you'll see various files generated by the “nest new” command. Don't worry; it's not as overwhelming as it looks. Here's a quick rundown of the key players:
package.json: This file keeps track of your project's dependencies and scripts.
nest-cli.json: Contains settings for the Nest CLI within your project.
.eslintrc.js: Defines linting rules for code quality. If you're new to ESLint, it's a tool that helps catch errors in our JavaScript code before we run it, and it also helps maintain a consistent code style. Feel free to modify these rules to customize your linting setup.
tsconfig.json: Configures TypeScript settings
NestJS projects use TypeScript by default, but don't let that intimidate you if you're unfamiliar with it.
As we've seen, our project root contains various setup files. We also have two important folders: “src” and “test,” along with a node_modules directory that houses our project dependencies.
The “test” folder, which we won't focus on much in this tutorial, contains end-to-end tests for our NestJS project. These are comprehensive tests that evaluate our entire server.
Writing end-to-end tests for NestJS servers is a substantial topic in its own right, so we'll set that aside for now.
Let's turn our attention to the “src” folder. This is where the heart of our application-specific code resides. It's the place for all the unique code that defines our particular application.
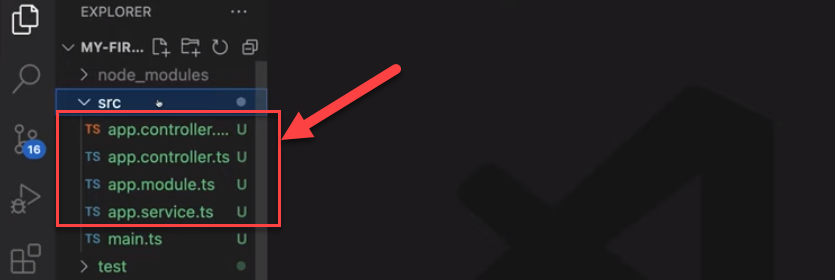
Inside the src/ folder, you'll find:
main.ts: The entry point of your application.
app.controller: Handles incoming HTTP requests, defines routes, and manages the request-response cycle for your application.
app.controller.ts: A basic controller with a single route.
app.service.ts: A basic service with a single method.
app.module.ts: The root module of the application.
The “main.ts” file serves as the entry point for our application. It's responsible for bootstrapping the server and setting it to listen on a specific port. We'll delve into this in more detail later.
Additionally, you'll see four other files, all prefixed with the “app.” These files form the core structure of our NestJS application, each serving a specific purpose in the framework's architecture.
The file naming convention in NestJS might seem repetitive at first, but it's actually a smart way to organize larger applications. Let's break it down:
The first part of the filename (e.g., 'app') indicates the feature or module it belongs to. For instance, 'app' refers to the core application, but as your project grows, you might have files like 'users.service.ts' or 'products.controller.ts'
The middle part of the filename ('controller,' 'module,' or 'service') specifies the file's role in the NestJS architecture:
Controllers handle incoming requests
Modules organize related components
Services contain business logic
The '.ts' extension simply indicates that these are TypeScript files.
This naming structure helps maintain clarity and organization as your application scales. Each file has a clear purpose and fits into NestJS's modular architecture.
We'll explore these concepts in more depth later, but for now, just remember that controllers, modules, and services each play distinct roles in building your NestJS application.
As you develop your project, keep in mind NestJS project structure best practices to ensure scalability and maintainability.
Step 5: Run the NestJS Application
Now that we've gone through those main files, let's run our NestJS application and see how it works. Thanks to the boilerplate generator, we can do this without writing any additional code.
In your terminal, make sure you're in your project directory and run the following:
npm run startYou should see an output in your terminal that ends with something like "Nest application successfully started." Congrats! Your server is now running.
Step 6: Test the Server
Now that our server is up and running, let's give it a little test drive.
There are several ways to send a request to this server. The easiest way is to open a new shell (keep the server running in the original one) and use curl:
This should return "Hello World".
So, basically, this command sends a GET request to our server, which runs on localhost:3000, Which means our server is listening to port 3000. And in case you're wondering where that was specified, it's in “main.ts.” That's 3000 passed to “app.listen.”
If you need your server to use a different port, you can easily change it in the main.ts file. For example, you could set it to 3001. After making this change, restart your server so the new port takes effect.
With the server now listening on port 3001, you'd need to adjust your requests accordingly. Accessing localhost:3001 would return "Hello World," while localhost:3000 would fail to connect since the server no longer listens on that port.
Generally, it's best to stick with port 3000 unless you have a specific reason to change it. One common scenario where you might need to use a different port is developing a NestJS backend alongside a React frontend, as React development servers typically use port 3000 by default.
Remember, whenever you change the port, make sure to update all your requests and any documentation to reflect the new port number.
So, we've covered one way to send requests to your server. I'll restart it now to use port 3000 again.
We've seen how to test the server using curl, but there's an even simpler method.
Just open up a web browser and enter localhost:3000 in the address bar. Hit enter, and you'll see the same "Hello World" response we got in the terminal.
This browser method is often more convenient for quick checks, especially when you're working on endpoints that return HTML or more complex responses. It gives you a visual representation of what your server is sending back right in your browser window.
Bonus Tip: Automatic Restart
If you find it annoying to restart the server manually after each change, there's a handy solution. You can use the development mode by running:
This runs the server in a watch mode, automatically restarting whenever you change your files. It's a real time-saver during development.
Conclusion
Great job on creating and running your first NestJS project! We've explored the project structure, learned how to start the server in different modes, and even looked at how to change the port if needed. These fundamentals will serve you well as you dive deeper into NestJS development.
But remember, this is just the beginning. NestJS offers a wealth of advanced features like middleware, pipes, and guards that can help you create even more robust and efficient applications.
If you're ready to advance your NestJS skills, CBT Nuggets' comprehensive NestJS tutorial series is the perfect next step. This series explores advanced topics and provides real-world examples to help you build powerful, scalable applications.


