TUTORIAL
How to Organize Outlook Email for the Web
Project Overview
EXPERIENCE LEVEL: Entry level
TIME TO COMPLETE: > 30 minutes
ESTIMATED COST: None
Before you Begin
Organizing Outlook email for the web is a simple process that will improve your email management and help you make the most of your time. You don’t need any specialized skills beyond a basic familiarity with Outlook—simply follow along with this tutorial.
Tools and Materials Needed
Organizing Outlook for the web primarily leverages its built-in features and tools. However, there are some additional supplies you might find useful:
Outlook web access
Microsoft To-Do (If you wish to use task management features)
Computer or mobile device
External storage (if you wish to back up emails or attachments How to Organize Outlook for Email for the Web
Are you struggling to organize your email in the web version of Outlook? Outlook online isn’t as robust as the desktop version. However, Microsoft is constantly improving it, and there are a few tricks you can use to make the tool easier to use.
Today, we'll explain how to organize messages in Outlook email for the web. If you want more Outlook tips, check out Simona Millham’s Outlook Online class at CBT Nuggets:
Step 1: Create Folders to Organize Important Emails in Outlook
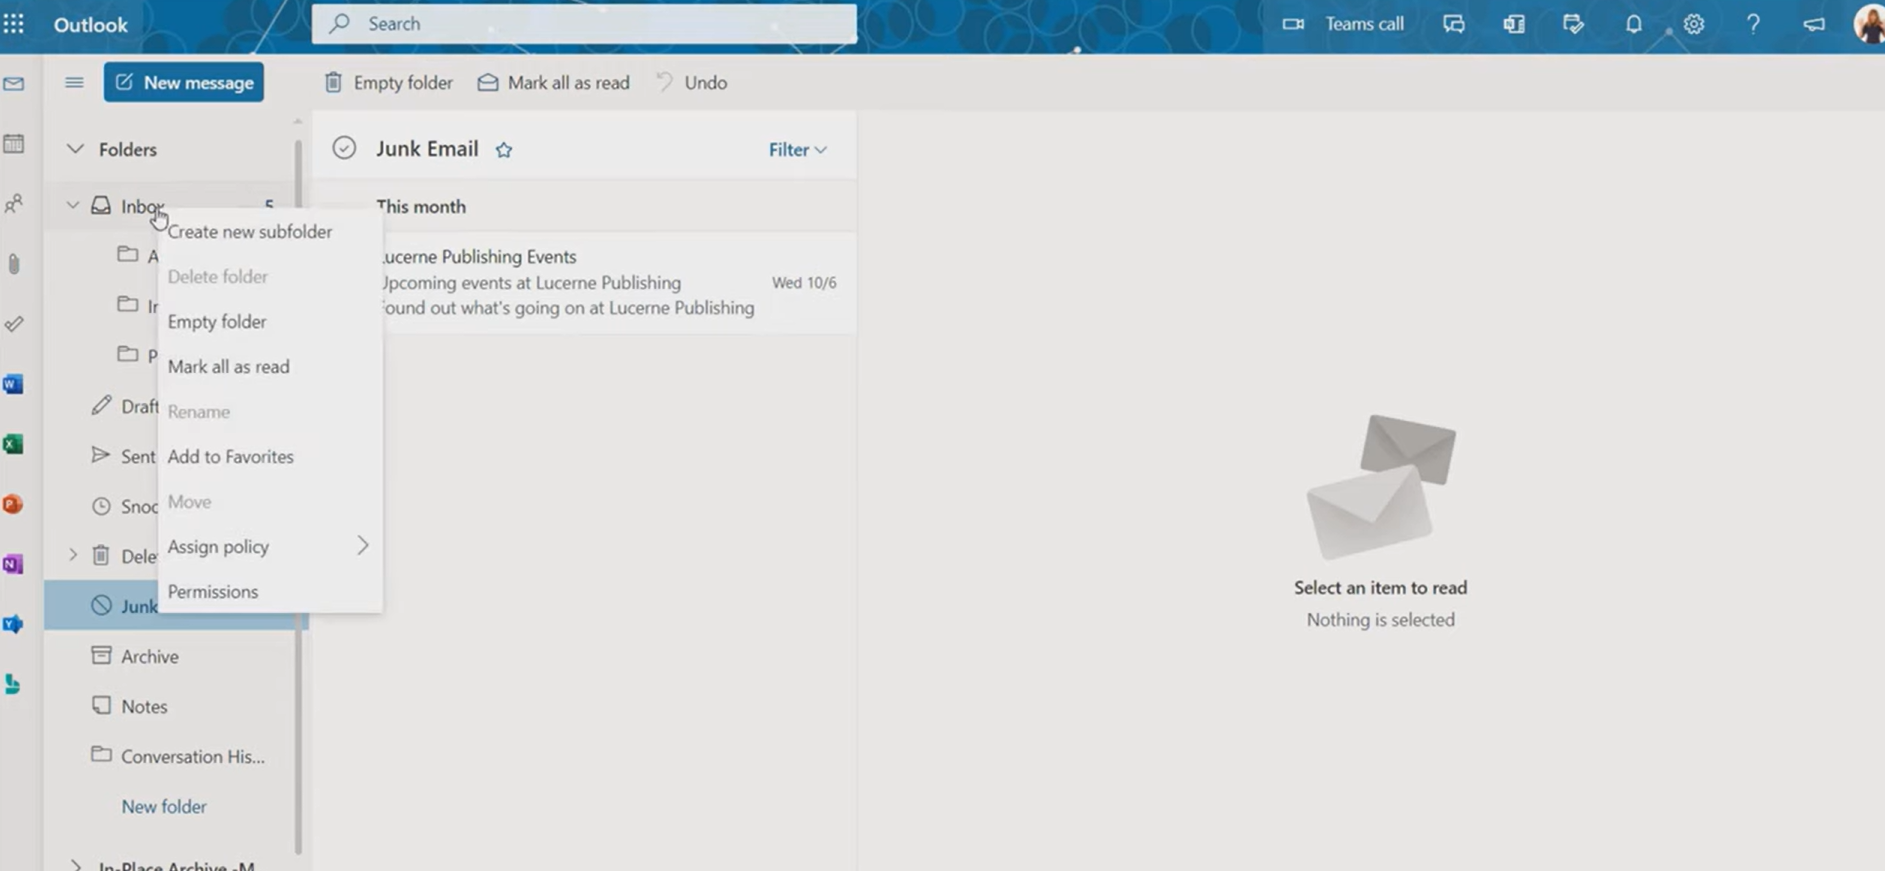
Creating folders in Outlook for the web is easy! Right-click on a root-level folder in the Outlook web client and choose the ‘Create New Subfolder’ option from the pop-out menu.
All user-created folders must live under a root-level folder. Root-level folders are Inbox, Drafts, Spam, Archive, etc. Root folders cannot be deleted, either.
Deleting a sub-folder is as easy as creating a new one. Right-click on the sub-folder you wish to delete.
One final tip: Folders can automatically delete old emails. Right-click on any folder and choose the ‘Assign Policy’ option. There are various settings to choose from. For instance, emails can be auto-archived after one year or deleted altogether after six months.
Step 2: Move Emails Between Folders Quickly
Nobody likes a messy inbox. I’ll let you in on my dirty secret. I get to inbox zero every day with this one simple trick! I move them to different folders. Here’s how to do that.
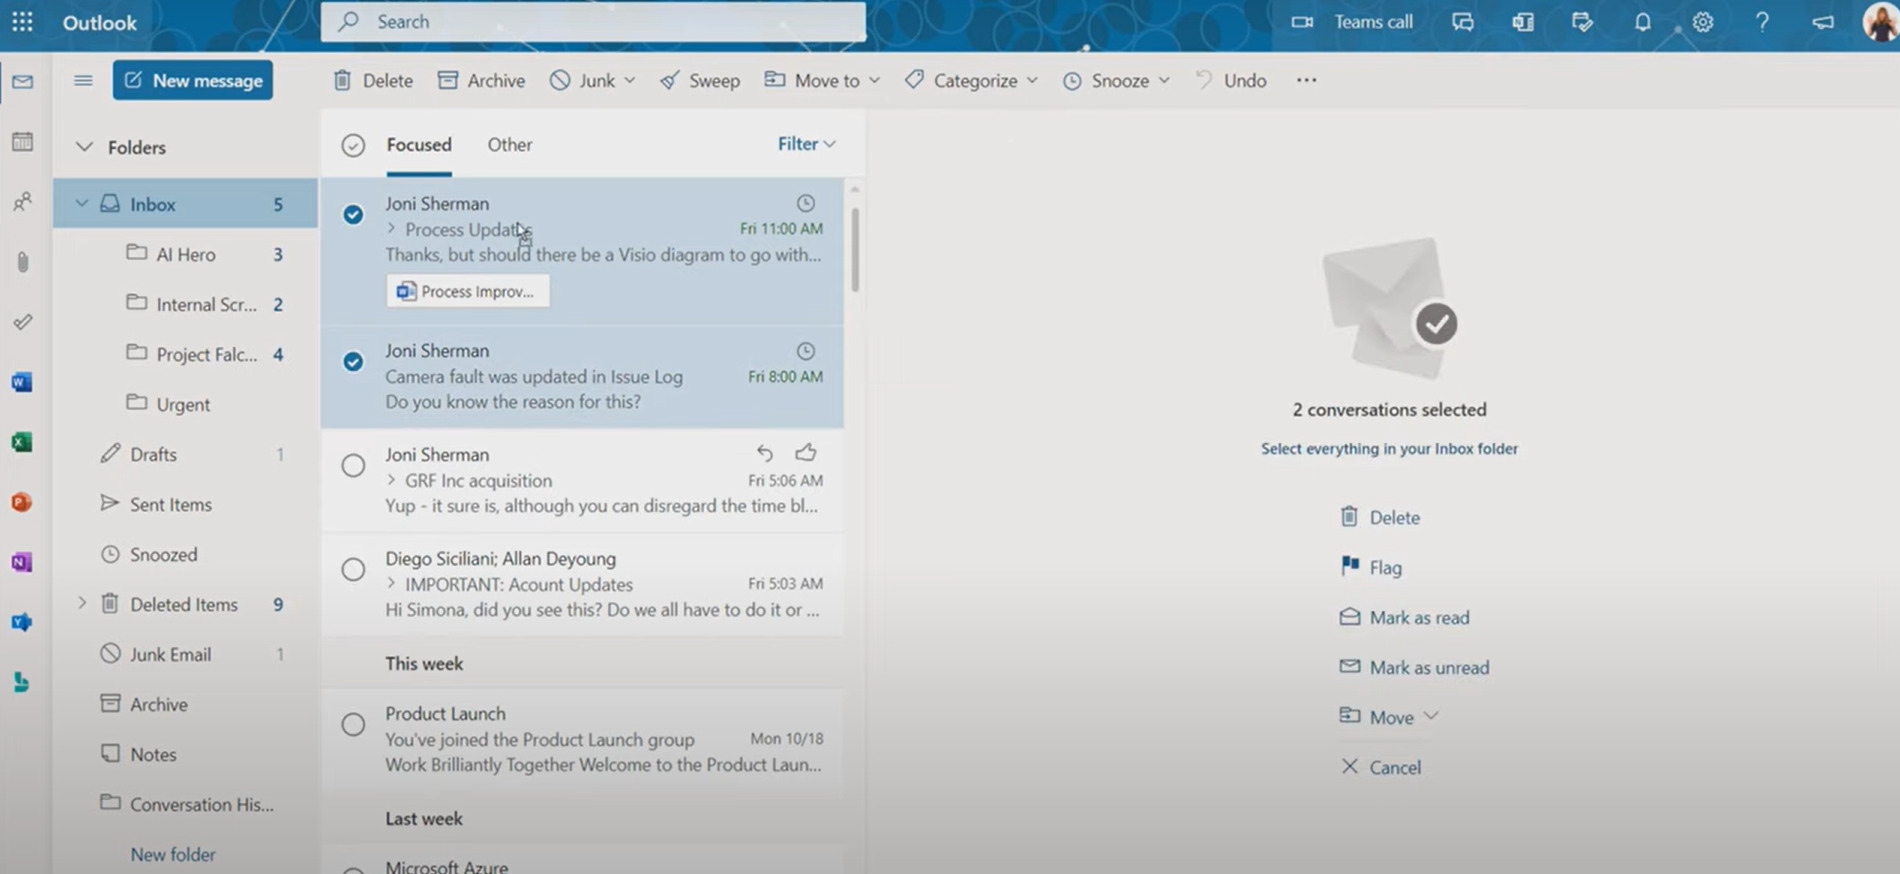
Toolbar options: Select an email. Then, choose the ‘Move To’ option in the toolbar at the top of Outlook. Next, select the folder that you want to move the email to.
Move multiple emails at the same time: Each email in Outlook's email list view has a circle next to the subject line on the left side of it. Clicking that circle will mark an email as selected. When you click those circles, they will turn blue with a check mark. Click multiple circles to select multiple emails, then click the ‘Move To’ drop-down menu in the toolbar in Outlook to move all those emails at one time.
Click and drag: Not every website does not support drag-and-drop functions, but Outlook mail for the web does. If you want to move a folder, it’s as easy as dragging and dropping it to another folder.
Step 3: Organize Your Folders in the Web Version of Outlook
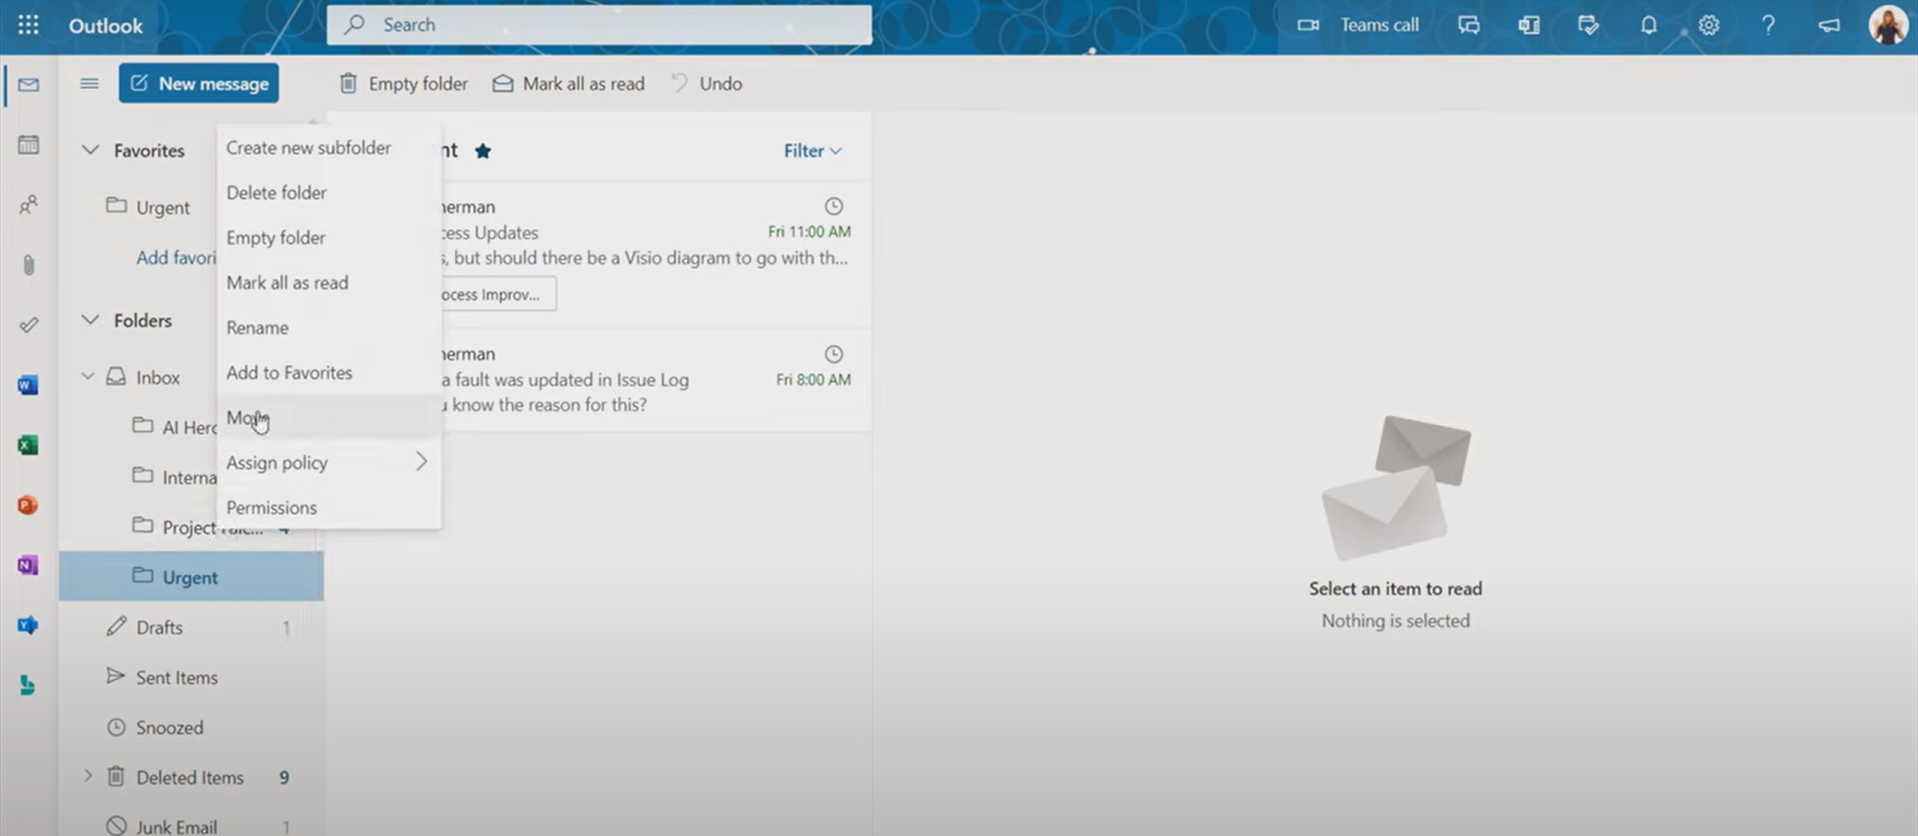
The Outlook website falls short on folder organization features. You can create subfolders to your heart’s content. However, those subfolders will always be listed alphabetically. So, if you want quick access to a folder, add it to your favorites. When a folder is marked as a favorite, it will always appear in the list of favorites in the side navigation panel of Outlook. That way, you don’t need to dig for it.
Right-click the folder that you want to add to your favorites list. Then, choose the ‘Add to Favorites’ option.
Step 4: Use Categories to Organize Emails
It's important to note that emails cannot be moved to two different folders in the web version of Outlook. Emails can be copied to another folder, but you’re stuck with two different copies of the same email. For example, if an email is both urgent and part of a specific project, you'll have to copy the email to have it in both folders.
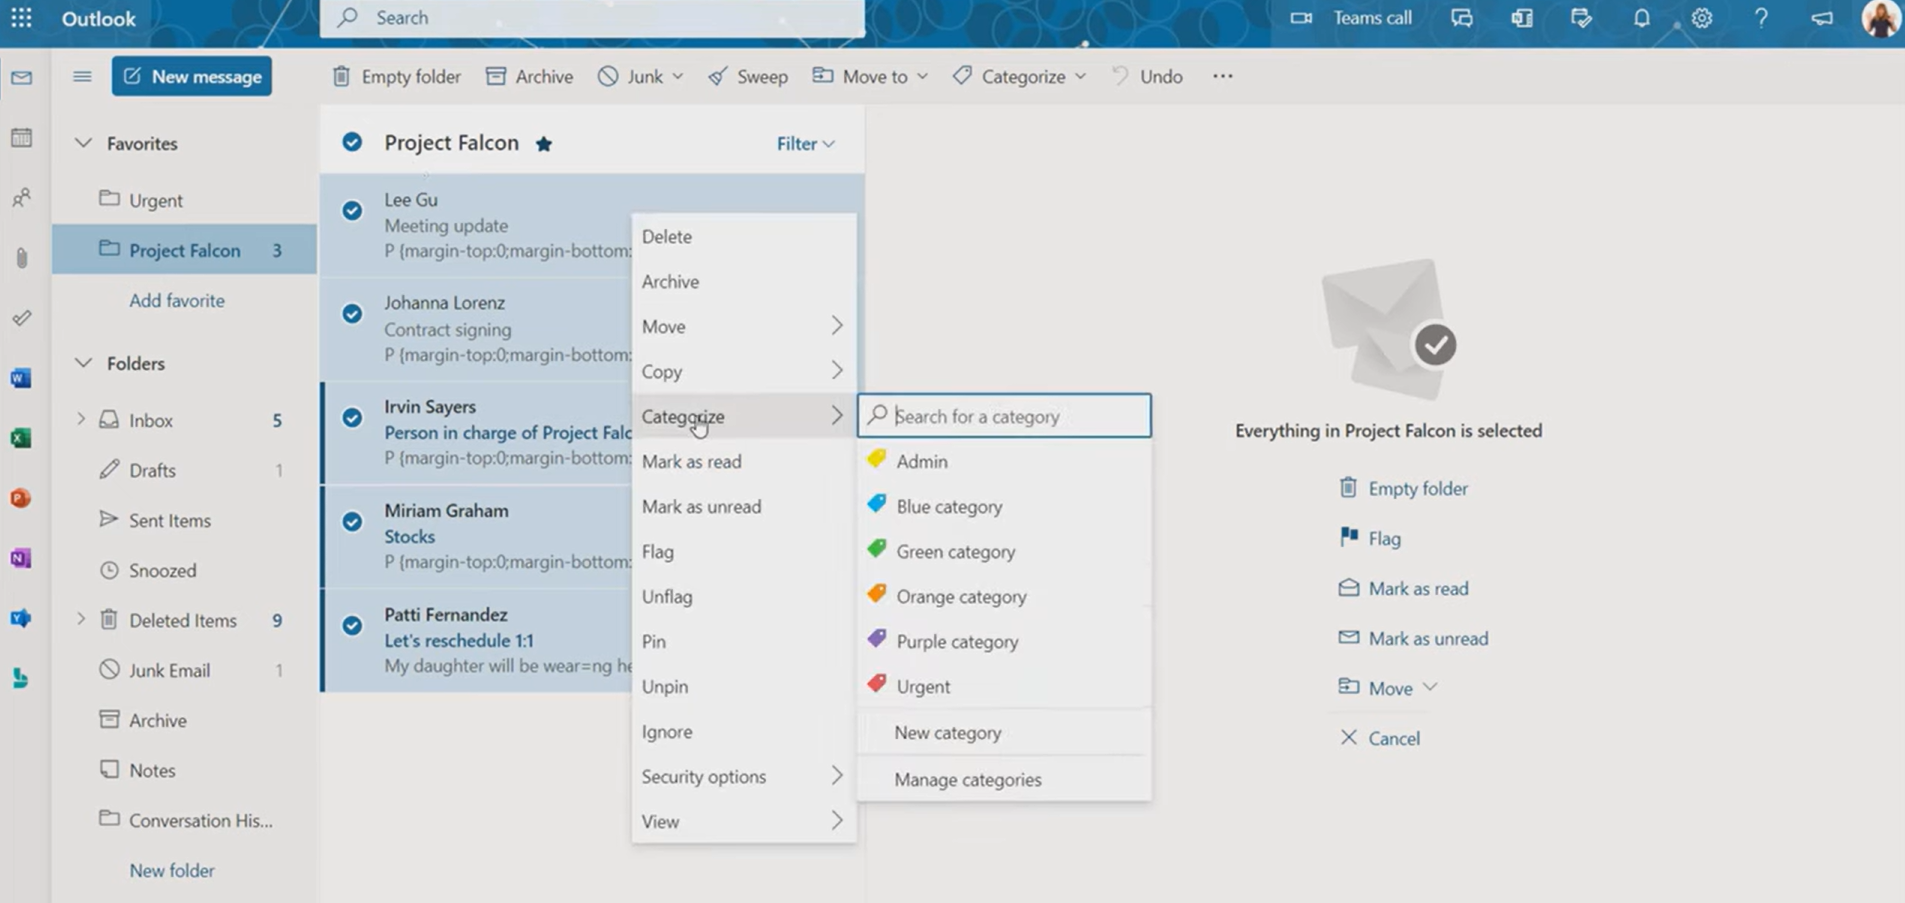
Instead, you can use categories. Right-click any email and then choose ‘Categorize.’ There will be a bunch of different options to choose from. Categories can be re-labeled, and you can create new ones, too. If you want faster access to a specific category, add that category to your favorites list.
Categories are a great way to organize emails. For instance, if you have specific folders created in Outlook for different projects, and you have emails regarding multiple projects, that email can be saved in the category for quick access instead of duplicating it.
Step 5: Add an Email to a To-do List in Outlook
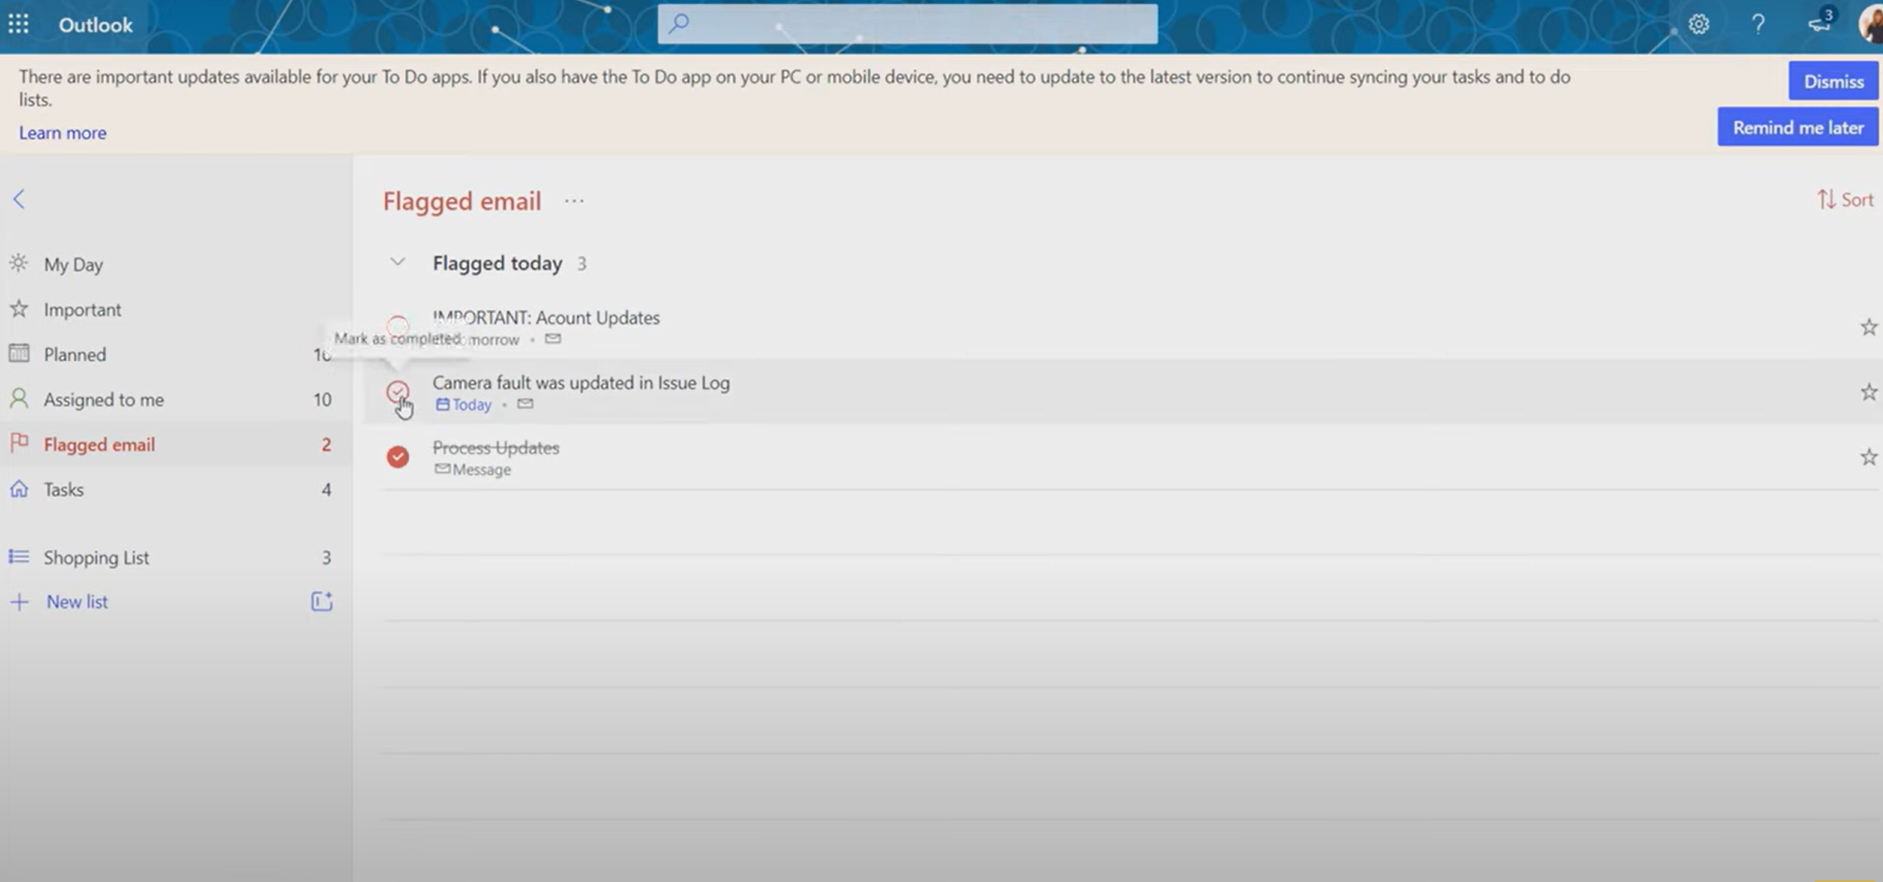
If you are a to-do list kind of person, you’ll love this feature. Microsoft has a to-do app like every other productivity suite. It’s simply called Microsoft To Do. It can be found in the far left-hand navigation window in Outlook Online. Look for the checkmark icon.
If you need to add an email to your to-do lists, first flag the email by clicking on the flag icon next to the subject line of the email in the email list pane.
Next, right-click that flag icon. You’ll have a list of deadlines. Choose the appropriate deadline, and that email will be added to your default to-do list in Microsoft To Do.
Ready to Leverage Outlook?
Are you ready to become a wizard with Outlook email for the web? This tutorial will help you stay organized and maybe even get to inbox zero. But there are plenty more ways to make the most out of Outlook.
Simona Millham is ready to teach you the dark arts of Outlook. Get started with online Outlook training today!
