Kubernetes 201: How to Deploy a Kubernetes Cluster

In the last blog post, we discussed Kubenetes, what it is, how it interacts with containers, microservice architectures, and how Kubernetes solves a lot of the problems around container deployments.
We'll tackle the components that form a Kubernetes cluster, different ways to deploy Kubernetes, then finally a lab time where we install our own single node cluster and deploy our first workload!
Kubernetes Components
The parts of a Kubernetes cluster is a quite large topic that could fill multiple articles. We're only going to cover the basics to present a framework on how a cluster works. This might seem like a bit of a dry subject, but it will illustrate the different features of Kubernetes clusters and you'll hopefully see how they solve problems inherent in traditional software deployments.
This is a great opportunity to introduce the official Kubernetes documentation. Concerning any Kubernetes topic, the docs are a deep well of knowledge and should always be the first place you consult to learn more, the cluster components being a great example.
But first you need to know about kubectl, which is the Kubernetes command line tool used to run commands on your cluster. You'll use it to inspect different parts of your cluster, deploy and view running workloads, troubleshoot issues, and other tasks. We'll install kubectl a bit later, just know for now that it's the tool you'll use most to interact with Kubernetes.
Every cluster has two main parts, the control plane and the worker nodes. The worker nodes run your containers via instructions based from the control plane. The nodes run your containers in Docker or another container engine as pods. Pods are the smallest unit of deployment in Kubernetes, usually made up of a single container with some exceptions.
Control Plane Components
The first main component of the control plane is the API server. It receives commands issued to the cluster and sends responses back out, much like any API. When you run a command with kubectl, it essentially talks to the API server and outputs the response to your terminal.
Next is the scheduler. When you deploy a pod the scheduler figures out where would be best to run it, looking at the loads already running on each node and any specific scheduling rules in place to make a decision.
The controller watches several elements of the state of the cluster to take action if the intended state isn't met. It monitors nodes and takes action to respond if a node goes offline. It handles maintaining a set number of replicas for pods. It directs internal networking so that a pod is reachable no matter what node it is on. The controller is basically the secret sauce that makes the Kubernetes multi-node clustering magic happen.
Our last major control plane component is etcd. This is a key store that holds all the cluster data. Think of it as a database that stores all the configuration of everything running in your cluster.
All of these control plane components are designed to be run with redundancy, typically with multiple virtual machines configured as control planes. Under the hood they are managing this redundancy with complicated logic loops and quorums, which are topics way outside of our scope for today but fascinating to dive into.
Worker Node Components
The first node component is the kubelet. The kubelet receives commands regarding pods from the control plane and talks directly to Docker on the node to make sure the correct containers are running and healthy.
Next is kube-proxy which directs networking on the worker. The best way to illustrate the power of kube-proxy is to forget about networking in terms of individual containers or virtual machines, if that's your background. Pods do get IP addresses within the cluster, but networking happens with services which abstract away the individual pod networking.
You might communicate with a pod using a DNS name which kube-proxy helps direct to the pod on the correct node, usually load balancing that communication across multiple pod replicas. This happens without you the user knowing or caring which node the pod you want to talk to is running on. Networking in Kubernetes is hard to get your head around at first, so don't worry if all that doesn't make sense quite yet.
Finally there's the container runtime, which is the software running the containers, usually Docker, but containerd and CRI-O are other options.
Cluster Deployment
In the early days of Kubernetes, building a cluster was a laborious manual process. This method can still be practiced today by following Kubernetes evangelist Kelsey Hightower's Kubernetes the Hard Way. Today there are much easier and safer options for bootstrapping a cluster, but reviewing KHW is still a rite of passage as it contains much to teach you about the guts of a cluster, following steps that newer tools have automated.
A much simpler method is to use kubeadm, which is a command line tool for cluster creation. You can run kubeadm on any Linux machine, whether a bare metal server, a virtual machine, or even your laptop. The process is fairly straightforward. It starts with installing and running kubeadm on the machine to be your control plane. It will install and configure the API server and other control plane components. At the end it will output a kubeadm join command containing an authentication token. You'll run this command on another machine with kubeadm installed or the same machine for a single node cluster. Kubeadm will then install the worker node components and configure them to talk to the worker plane. Install as many nodes as you'd like and essentially you'll have a functional cluster.
The next and most simplest method of building a cluster is with cloud managed cluster tools like Amazon's Elastic Kubernetes Engine or the Google Kubernetes Engine. These services manage all the cluster provisioning and maintenance for you like upgrading clusters and adding or removing nodes. You simply choose the number of nodes you would like and the machine specs and the service deploys virtual machines and sets up your cluster. Easy peasy. Other services like Azure, DigitalOcean, Linode, and others offer similar services and all are fairly comparable. All the platforms charge as normal for the VM resources you use but the Kubernetes service is free. AWS being the exception, asthey tack on a $0.10/hour charge per cluster for EKS on top of the EC2 charges.
It's worth mentioning also that there are other Kubernetes management applications that handle a lot of the same lifting as these cloud provider services but without the lock-in to a single provider. These are a bit more complicated to set up but allow for a lot more granular configuration and management options. For starters check out Rancher or RedHat OpenShift.
Minikube Lab
All those hosted and bare metal deployment options sound great, but what if you just want something small and free to use for learning, testing, and development? Look no further than Minikube. This tool installs a single-node cluster on your local computer, is super easy to set up, and is perfect for getting your feet wet with Kubernetes.
So enough talk, let's install it and deploy some stuff! First step though will be to install kubectl, since you'll need some way to interact with your cluster. Next install Minikube itself, which will also require installing a hypervisor if you don't already have one (don't worry, the doc links to install instructions for each hypervisor, if in doubt about which to choose go with VirtualBox).
Once everything is installed open a terminal and type:
Once everything is installed open a terminal and type:
minikube startMinikube will probably need to download an image file, then hopefully you'll see
Done! kubectl is now configured to use "minikube."Moment of truth, time to run your first command on a Kubernetes cluster. Type
kubectl get nodes… and you should see:
kubectl get nodes
NAME STATUS ROLES AGE VERSION
minikube Ready master 2m v1.18.3
Your first Kubernetes cluster is installed and live! The
get nodescommand simply returns a list of all the nodes in the cluster and their status. You can also run:
kubectl get componentstatus… to see the control plane components and their statuses. Our node is healthy, now let's get real crazy and deploy something.
Copy and paste these two commands in order:
kubectl create deployment hello-world –image=paulbouwer/hello-kubernetes:1.8
kubectl expose deployment hello-world –type=NodePort –port=8080
These might look like Greek but are actually pretty straight forward. The first, just like it says, creates a deployment in your cluster with the name "hello-world." The image part is the container that we're deploying from DockerHub named "hello-kubernetes".
The second command exposes the deployment, which basically means that it wires up networking to the pod. Remember, kubectl is sending these commands to the API server, which then fires off the scheduler, controller, and kubelet to do their parts to start up your resources.
Now run:
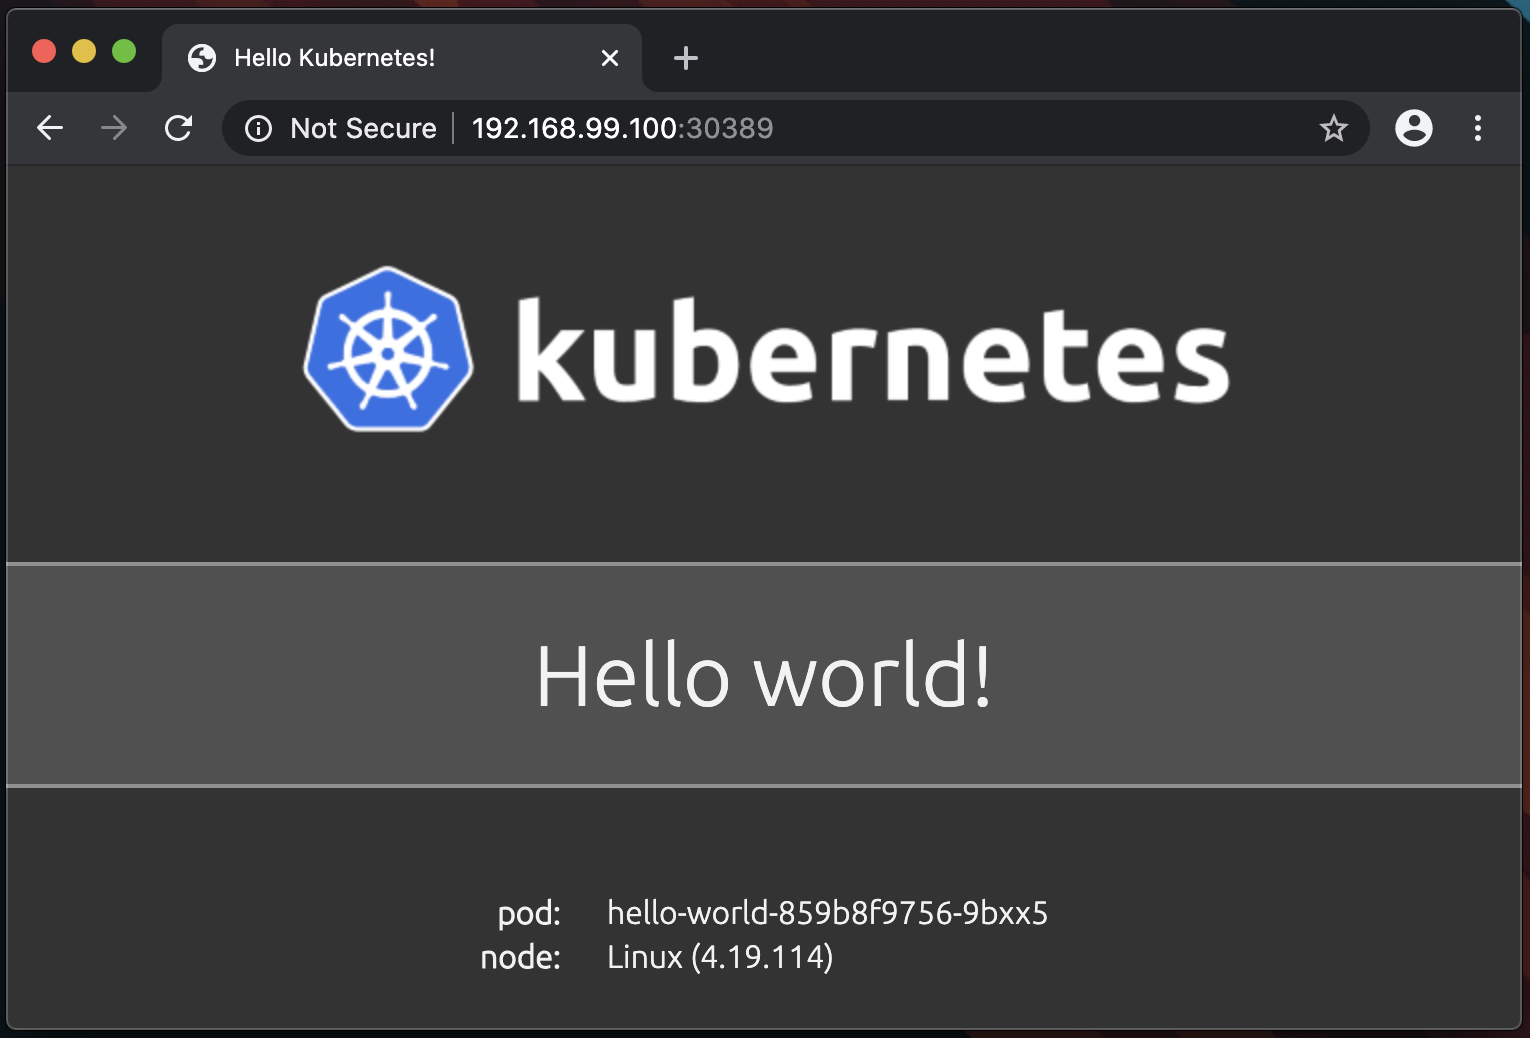
minikube service hello-worldExciting things should happen, specifically your browser should open to a webpage greeting you to the world of Kubernetes:

What you're seeing is a web page running on your freshly deployed pod. The pod runs a small web server with a page that says hello and shows the name of the pod. Your pod name will be different as Kubernetes appends deployment pods with a random string on the end. Back on your terminal, run kubectl get pods and you'll see your pod that will match the name on the web page:
> kubectl get pods
NAME READY STATUS RESTARTS AGE
hello-world-859b8f9756-9bxx5 1/1 Running 0 2m
Congrats, you've bootstrapped your first Kubernetes cluster, created a deployment, and exposed a service to access the pod via the browser. When you're done admiring your handiwork type:
minikube stopin the terminal to stop the Minikube VM and free up the CPU and RAM it was consuming.
This is obviously a super simple lab exercise just to get your feet wet, there's a TON more to learn and the docs site has a great set of tutorials to continue with. Check those out, type deploying a cluster using kubeadm on some virtual machines, and when you're really ready to dive in deep check out the Certified Kubernetes Administrator certification. As Obi-Wan said, "You've taken your first step into a larger world!"
delivered to your inbox.
By submitting this form you agree to receive marketing emails from CBT Nuggets and that you have read, understood and are able to consent to our privacy policy.